FAQs on Acrylic Aquarium
Repair and Modifications:
Leaks, Deficient Seams
Related Articles: Aquarium Repair,Related FAQs: Acrylic Repair 1, Acrylic Repair 2, & FAQs on
Acrylic: Design, Scratches & Crazing, Drilling/Cutting, Construction, Solvents, & Glass
Aquarium
Repair, &
DIY Gear 1, DIY
Gear 2, Tanks, Stands, Covers,
Custom Aquariums, Stands,
Covers...,
|
|
|
Acrylic Repair 4/19/20
Good morning,
<Anthony>
I wanted to reach out and thank your whole crew for helping organize a lot
of great information on this site!
<Ahh! Thank you for your kind, encouraging words>
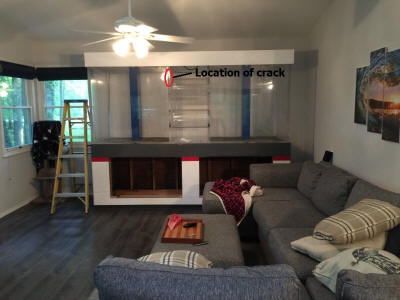
I recently purchased a used 1200 gallon 10x4x4 with 1.25” acrylic walls.
<Mmm; I'd rather 1.5" material...>
It was on a horribly uneven and rusty stand,
<Yikes>
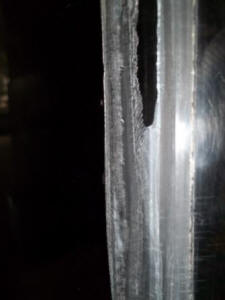
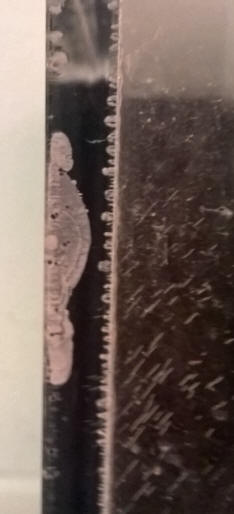
but still holding water, and I’m worried about this one seam on the tank
along the top center wall.
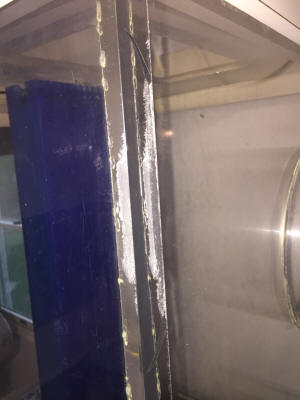
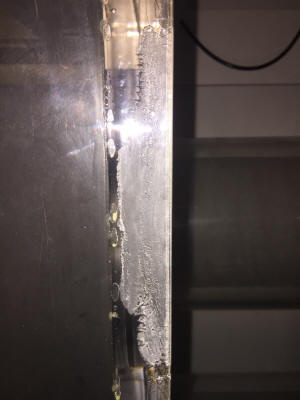
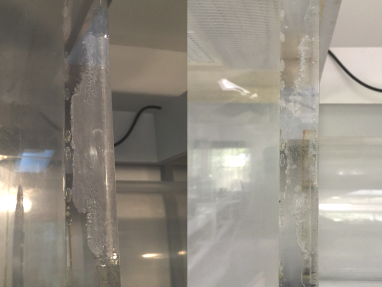
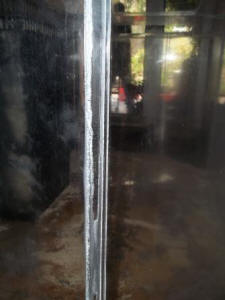
<I see this "white out" area in your pic>
All the other seams hardly have a single bubble, and it’s on a new level
stand. Can I just use Weldon to strengthen this top seam if all the other
seams are near perfect?
<This is what I would try... tilting the tank so the open slit of the seam
is facing upright, putting some sturdy tape along the panels to disallow the
wandering of the low viscosity Weldon, saturating the gap, allowing the
solvent to fill this area... waiting a day to see if this has helped
sufficiently>
Thanks in advance,
Anthony
<Certainly welcome. Bob Fenner>
|
.jpeg) |
|
Re: Acrylic Repair 4/20/20
Thank you very much, I will try my best! Tilting this tank is a whole
project in itself.
<Mmm; thought about this; yeah. Tilting up a ten foot high tank... Maybe
just on the edge will do; be better than just vertical>
Would you recommend Weldon 16 with a high gauge needle for this? Thanks
again, Anthony
<Yes to the #16 and small gauge needle. It REALLY flows into small gaps. Bob
Fenner>
|
|
Acrylic Repair 3/17/20
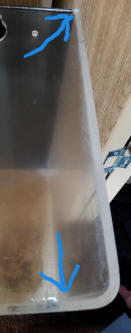
Hello, I was gifted a 55 gallon Clarity Plus tank (Score!!). The top right
end seal between the arrows on the picture is completely gone (can sand
between the sheets) and possible stress marks in other seams. After reading
through a bunch of your information, I plan on getting some 3/8" square rods
(the tank is 1/4") and solvent them into the entire inside.
My question is whether or not to use Weld-On 3 on the separated top piece
first or not, especially since it goes completely around one corner?
<Likely a good idea... to use a more viscous product. Less viscous/gooey on
the doweling>
Also, how does one reinforce the curved front corners?
<I would leave these as is. This tank should give you good service once the
other repairs are done>
From the pictures, is there anything else I should be aware of? Thank you so
much for your time and expertise.
<Mmm; nothing more. If this were my tank, and I intended to use it long
term, I would proceed as you have detailed. Bob Fenner>
|


 |
|
Re: Acrylic Repair 3/17/20
Awesome! I was planning on using Weld-On 16 for the dowelling.
<Yes; this would be my choice>
Should I clamp it in place first and let it seep in?
<Better to just use tape, if deemed necessary; will allow easier flow>
Or put it on first and place the dowels on afterwards?
<Mmm, no, put the cut/sized dowel piece in, one at a time, tilting the tank
letting gravity help with the placement, then use a thin-tipped application
bottle to have capillary action fill the gap. Takes very little material>
I was trying to find that answer on your website, but not running into it...
<I should get off my duff and make a YouTube presentation, or find one and
link it re. Do ask about at your local fish store, aquarium club... plastic
outlet/fabricator to see if someone who has done this work will show you in
person.>
Thanks again,
Julie
<Welcome. BobF>
|
|
Hello Question about acrylic crazing or seam failure
12/7/19
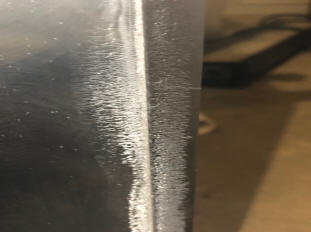
I Bought this tank used. After getting it home noticed these scratches.
<Crazing>
I read your article but don't know how to differentiate between crazing and
seem a failure.
<Seam failure is between annealed/solvented surfaces, crazing stress
fracturing outside the joint>
The tank is not leaking and holds water. Can you shed some light before I
stock this tank.
Thank you,
*Utsav Khatiwada*
<I'd likely still use this tank; assuring its on a stand that is planar,
level (and strong of course). The seams appear strong (enough), just a bit
unsightly. Bob Fenner>
|
Re: Hello Question about acrylic crazing or seam failure.
12/8/19
Yes the stand is very sturdy and the tank has a built in cushion at ye
bottom. It’s for my WC Frontosa Mpembew colony so wanted your expert
opinion.
<Ahh, I too raise frontosa, but not from this locality>
Thanks and I will use this tank until any issue. Thanks
<Certainly welcome, BobF>
Re: Hello Question about acrylic crazing or seam
failure. 12/13/19
Hello there,
<Greetings Utsav>
First I would like to thank you for sharing the information with me. It has been
a blessing.
Do you recommend to seal all the tank with Weldon just to be on the safe side?
If yes, what kind of Weldon should I use?
<I would not randomly apply this solvent... ONLY where the joint is whited
out...
The #16 of Weldon or equivalent is my choice in terms of low viscosity; ability
to seep into the joint. You may need to flip the tank over so the solvent can
more easily soak into the space. IF there's a concern for leaking, DO read on
WWM re installing triangular or quarter stock in all seams>
The tank is dry and hasn't been operational, so I was thinking of taking care of
the maintenance before I pour water in it.
<Good>
Thank you,
*Utsav Khatiwada*
<Welcome. Bob Fenner>
|
|
Aquarium repair 12/6/19
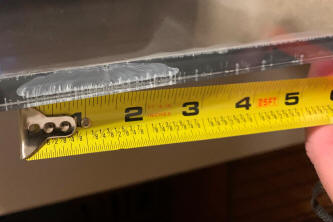
I have a 180 gallon acrylic tank 72x24x24 the tank is empty and it has maybe a
seam separation not sure what it is her is a picture of it any help Thanks
<Hi, could you please resize/crop the image down to just a few hundred Kb's and
resend it? Wil.>
|
 |
|
Aquarium repair 12/7/19
I have a 180 gallon acrylic tank 72x24x24 the tank is empty and it has maybe
a seam separation not sure what it is her is a picture of it any help Thanks
<Mmm; you may be fortunate here to be able to simply apply a low viscosity
solvent (Weld-on 16 would be my choice) to the seam/area here this is whited
out. Elsewise, annealing a square or triangular dowel in the inside corner
(the entire length, if it were mine, all inside corners), cut to size, as
gone over on WWM re acrylic repairs. Bob Fenner>
Re: Aquarium repair 12/7/19
So I should apply Weld-on 16 from the top to the bottom seam and add a
acrylic piece as well top to bottom
<Mmm... the solvent just to the joint (bottom) where the whited out area is
what I would try first. Give it a couple days to cure. BobF>
|
|
Acrylic Tank seam crazing... 8/29/19
Hello, My name is Mike and I have a question about my 280 gallon 72x28x24
acrylic tank. On the front panel of my tank both side seams are starting to look
like the photos below... Should I be concerned and is there a way to fix and or
prevent from getting worse?
Thanks, Mike
<Hey Mike, could you please resize your pix to only a few hundred KB's and
resend them ? Other wise you may crash our server. Wil.>
Acrylic Tank seam crazing... 8/29/19
Hello, My name is Mike and I have a question about my 280 gallon 72x28x24
acrylic tank. On the front panel of my tank both side seams are starting to look
like the photos below... Should I be concerned and is there a way to fix and or
prevent from getting worse?
Thanks, Mike
<Is the front panel bowed?...apparently the water pressure has weakened the
seam/seal and it may worsen in time, unfortunately the route to go is to drain
the tank and get some skilled, experienced person to reinforce it, please see
the following link and above.
http://wetwebmedia.com/acrylictkreprfaq2.htm Cheers. Wil.>
|
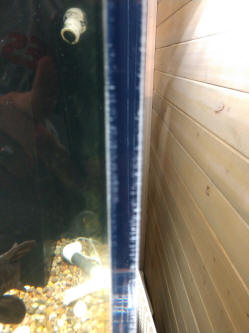
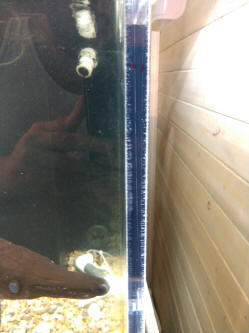 |
|
Re: Acrylic Tank seam crazing... 8/29/19
The front panel is slightly bowed, maybe a 1/8"... I was afraid some
reinforcement was probably going to be needed luckily I am fairly skilled at
working with / welding acrylic.
<Great that you are skilled Mike! Good luck with the repair.>
Thanks for your help!
<You’re welcome. Wil.>
|
|
Failed Seam? 6/4/19
Hey guys.
<Hey Cody>
I have a 250 gallon L shaped TRUVU aquarium that I purchased second-hand. I
noticed that all of the seams kind of look like this. Lines throughout the seams
and hazy looking. Are the seams failing or is this
normal?
<It is not normal; water pressure has weakened the joints. I advise you to
reseal all the seams with a low viscosity Weld-On product... a professional or
skilled person may do this for you.>
Thank you SO much for any advice,
Cody
<You´re welcome. Wil.>
|
 |
|
acrylic crazing 5/14/19
Is this fix able? What # Weldon would I use and how? Thanks so much
<Mmm; not crazing... but a failure in the seam/seal itself.
The choice up to you, but I'd likely solvent a (two inch or so acrylic) strip
along the side (edge where the two pieces meet)... akin to glass/Silicone
aquariums where the seal is (badly) compromised). I would
NOT add Weldon or other product to the existing seam as this may simply weaken
the current bond. Bob Fenner>
|
.jpeg)
 |
Potential disaster?
9/2/18
Hello Experts!.
I set up my old 240 (well over 30 years old) that had been dry for years. I
noticed 2 months later now that the lower right corner seem has turned white for
about 6".
<Yikes>
The Aquarium- A Tru-vu has survived Earthquakes and bad leveling before over the
decades...moved and dried for long stretches too.
Since its full of (80 pounds of pool sand) sands ,fish, water plants. Is there
anyway to inject a glue into a seem underwater..that still has no gap?
<No there is not. Do NOT use acrylic glue... it's not glue, they're solvents!
Will loosen the gap here. The system HAS to be drained/emptied, completely
dried... AND THEN I would solvent a square/dowel along the entire seam. In fact
I'd go ahead and do ALL the inside seams while you're at this. DO take care to
inspect the doweling, as it is often only square/flat on two sides (of the
four); you WANT these two flat sides at the seams>
Is there any miracle cure?
<None that I'm aware of>
Its survived a lot. I did put even more bracing under that corner..hoping to
remove anymore stress.
What are the odds..it just stays the same another decade or so?
<Not good enough for my peace of mind. I sold hundreds of Tru-Vu Aquaplex tanks
over the years. Very good products; thirty years of service is exemplary>
AS long as I'm asking..if it ever leaks? is it possible for average guy me to
fix it - by then dry of course.
<Yes it is; as briefly gone over above and over and over archived on WWM>
I only thank god I used and had all the hardware to start. I only have bought
about $150 worth of fish and plants. From the gitgo I wanted a budget big
freshwater setup.
So, If it should give out..I still don't want to give up on the thing.
BUT!!,right now, any IN TANK repairs that would help? Asking a lot..but
something must have been invented for non toxic in tanks glues!.. I hope!
<No in-tank ones unfortunately. IF this were a MUCH larger system... we might
discuss making a chamber to fit the corner inside to work in dry...
Bob Fenner>
thanks!
Stan.
Re: Potential disaster? 9/2/18
Thanks for the reality check.. All I can do is see if its stopped in its tracks
with more bracing.
<We did these fixes all the time... esp. important in CA where the ground shakes
at times. Weld-On 16 does a good job viscosity wise for both the in-fill and the
new bracing>
I know that if it gives..I will fix it. Only when its dry this time..I redo that
whole tank and buff the heck out of it. 35 years of algae scraping scratches
means its also not the clearest sheet of Acrylic on the
block.
<Ah yes>
Somebody else said that fixing a de-seamed Acrylic is easier then glass...you
don't remove the Acrylic panes. you just fill in the gap and by the next day you
COULD fill it with water. I hope!
<Mmm; well; both are a pain. Just today resealed (over) a Juwel/Eheim four foot
tank...>
I appreciate your help, believe me!
Stan.
<Oh yes; I can indeed imagine. Cheers Stan. BobF>
Re: Potential disaster? Acrylic seam repair cont.
9/3/18
One more question, I have to ask- Would it help top apply weld 40 or even super
glue to the outside seems length?
<... no; don't do this>
Stop it in its tracks? Prevent further travel?..
<No Ad... again, acrylic solvents are just that. They'll open the gap if the
seam is under pressure>
I found a months ago photo of that tank-and it was already liked that.
After 35 years, I stopped noticing things I guess.
THANKS!
<Welcome. B>
|
Acrylic Aquarium Question- help
10/25/27
Hello-
<Howsit?>
I’ve been reading your forum on Acrylic seams, cracks, etc and wanted to ask Bob
Fenner a question. I can’t see where to post a question and was wondering how to
reach him? I just built my first aquarium, it’s 300 gallons and I have some
concerns about the seams that I wanted to ask him. Can you advise where to ask?
<This is it mate. Please ask away. Bob Fenner>
Thank you!
David
Re: Acrylic Aquarium Question- help 10/25/27
Hey Bob! So, like I said I just finished my first build, of a 300G acrylic for
my home. It’s 1” acrylic on all sides and 1/2” on the top and bottom.
<? I encourage folks to have tops, bottoms of acrylic tanks at least the
thickness of the rest... thicker if the tank is tall>
It will be set on top of a solid wood stand with a 2” thick concrete countertop.
Dimensions are 72x24x30. Everything was cut with CNC machine and all the pieces
are square/plumb, etc.
<Good>
All my sides came together perfectly and my top went on perfectly... my only
concerns are with the bottom piece. I did the bottom last, and with all the
weight (even using the pins method) the weld-on #4 didn’t create solid clear
joints like everywhere else. There were like 5-6 spots total around the whole
base where it created pockets that sealed and I just couldn’t wick it in there.
Doing this over, I think I would’ve used the 2-part epoxy, but overall the
solvent did really well considering it’s 1” thick acrylic. So, all things
considered I’m happy that the joint pockets happened on the bottom piece rather
than the corners or the top (I think?) take a look at the attached pics and let
me know your thoughts. Would a catastrophic failure be possible if only the
bottom seams are like this, since it’s fully supported underneath? Like I said,
90% of the bottom piece is good, but there are several pockets that are there.
Thank you for your help!
David
Ps. After reading all the forums, I realize I could have added doweling if need
be, but I already added a thick bead of #16 around all the bottom seams for
extra support. I filled the tank twice and let it sit for a couple days and had
no leaks, no movement, no cracks or hazing, etc.
<Mmm; okay... IF there is further concern (or reason for concern!), I would add
the doweling all around the inside bottom. Bob Fenner>
|

  |
|
Re: Acrylic Aquarium Question- help
10/26/17
Hi Bob-
<Hey David>
Is there reason for concern after seeing the pics of the bottom joints?
<Mmm; not much; no. I would have stated (shouted) emphatically if so>
If there were to be a failure, what do you think the signs would be if this
is only the bottom piece?
<Whiting out of the joint, with the creeping whiteness extending the entire
width of the joint... DANGER>
Is the bottom piece the least stressed since it’s got full concrete support
underneath?
<Not the least... this would likely be the top. It's not too late to anneal
another panel to both top and bottom if you're concerned>
How would I place the doweling (if needed) if I already put a thick bead of
#16 around all the inside bottom joints?
<Mmm; you're not going to like this; but gingerly using a tool to chip,
grind out the material that would be in the way of the dowel.
Another/alternative would be to affix another bottom all the way around,
enclosing the present one and a small area of the viewing panels. This is
often done with large, very large circular acrylic fiberglass tanks. Where
to send you for further input.... oh, for sure:
http://www.waterdogproducts.com/
Bob Fenner>
|
|
90 gallon reef tank... cracks. Crazing?
10/17/17
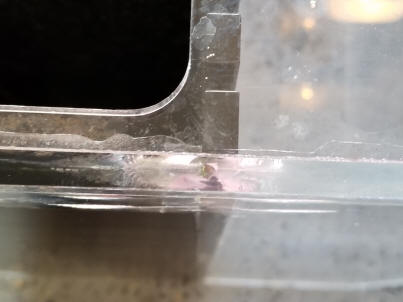
I have a used 90 gallon reef tank with these cracks at the top of the
tank at the overflow. The overflow is on the side. You can't
feel them from the inside or outside. Or these fixable or is my tank
done and should be
trashed
<.... I take it this system is acrylic... Need to see well-resolved images of
the "bad areas" to give much of a solid opinion. Please read here:
http://www.wetwebmedia.com/acraqleaks.htm
and the linked files (above, in blue), and send along the images when you can.
Bob Fenner>
re: 90 gallon reef tank 10/18/17
These are the best I can get.
<.... wouldn't worry re these. IF/when the system is empty, dry, perhaps some
Weld-On 4 as gone over on WWM. BobF>
|
 |
|
re: 90 gallon reef tank 10/18/17
So this tank is ok to use as my main tank?
<Yes>
Also if we're get some weld on 4 how would I get it into the cracks since they
are not open to the tank inside or out?
<Only at the seams. B>
re: 90 gallon reef tank 10/18/17
Ok you are awesome thank you so much
<Welcome. B>
|
Acrylic Aquarium Seam Failing ...Did I make it worse?
10/10/17
Thank You all for the FAQs on acrylic aquarium repair.
<Welcome Chris. Am very glad to have accumulated these>
Your site is sure to become a valuable resource for me. I have a used
325 gallon 2mX80cmx80cm acrylic tank. Some of the corner seams have the
white crescents and other irregularities which look exactly like those
on the
photos on your site at:
http://www.wetwebmedia.com/acraqleaks.htm
FAQs on Acrylic Aquarium Repair and Modifications: Leaks
...<http://www.wetwebmedia.com/acraqleaks.htm>
www.wetwebmedia.com
Acrylic Aquarium Repair 4/15/17 Hello there and thanks for providing
such an informative website! I purchased a used acrylic tank whose
condition is a bit rough, it ...
I had outlined some of the crescents in marker when I set up the tank in
Dec 2015, and noticed yesterday that many had grown considerably
and are approaching the interior edge of the seam.
<No bueno>
So I drained the tank about 60% and used a locally-available
water-thin plastic solvent in the white areas of the seams (dripped in
with a needle applicator) .
<... while the tank had water in it? Yeeikes... the solvent could melt
the existing bond!>
I could see the solvent quickly spread by capillary action, but the
areas remained white.
<Yes... may be too "whited out" to make a clean joint again...
NEED to empty, dry... apply the most viscous Weldon (or equivalent) you
can get, tape over the applied areas to give the solvent time to work>
Oh By The Way...I live in Japan. So none of the labeling on the solvent
that I used is in roman letters, so I cannot tell exactly what chemical
it is.
I am going to try and obtain some Weldon 4. But first I have some
questions:
1. Must the white areas turn clear to be fixed?
<Mmm; no... but the "clearer they are", the more fixed>
2. Have I maybe applied a barrier to the Weld-on 4 being able to make a
bond?
<Ahh, yes!>
3. Is Plexiglas similar enough to tank acrylic to test adhesives? IE if
it works or does not work on Plexiglas, will it work or not work on
acrylic?
<The terms acrylic and Plexiglas (both PMMAs) are often used
interchangeably. Solvents, tools, methods for one should work on the
other.
http://akriform.se/en/news/plastic-acrylic-and-plexiglass-we-explain-the-difference/>
Thanks in advance for any advice,
--Chris
<Welcome. Bob Fenner, who WOULD re-read what we have on WWM, and LIKELY
install the square Plexi doweling as gone over here>
Re: Acrylic Aquarium Seam Failing ...Did I make it worse?
10/11/17
Many Thanks Bob
<As many welcomes Chris>
Oh yes, if/when I am ever obliged to move, I'll definitely have that
square doweling installed in all the corners before setting up the tank
again.
(And have a cement-floored fish room with a drain, ha!)
<And a built-in cabana bar!>
I did draw down the water level to below where the 'white area' seam
failures are occurring.
<Good>
You have started me on doing my own research, but in the meantime;
By "most viscous" Weldon product, is there a specific one that you
recommend? Is it also applied with the needle applicator?
<The number four is best here: You can buy it from Amazon and use it
with the needle applicator:
https://www.amazon.com/Weld-Acrylic-Adhesive-Applicator-Bottle/dp/B0096TWKCW
--Chris
<BobF>
Re: Acrylic Aquarium Seam Failing ...Did I make it worse?
10/13/17
Thanks Again Bob
Now I need to pass-on the good karma this week ��
<Ahh. B>
--Chris
|
Large Acrylic Tank; joints whiting out, crack...
6/22/17
Dear WWM,
<Casey>
I would be very grateful if you could give me some advice.
<Glad to>
I recently acquired a 700 gallon acrylic aquarium. I thought it was a
real steal for $500.
<Tis; for the acrylic alone...>
The aquarium has an area about 8 inches long at one of the seams that
appears to have been damaged judging by the visible hazing in this location.
<Yes; the weld/joint is going bad...>
There are two visible cracks on either end of this area that
may have occurred when moving the tank into my house (I'm not sure if they were
there before, the hazy area was there before, but I had not noticed the cracks
before the move).
<Mmm; more likely from before... when the tank was full. These cracks are most
often due to uneven pressure when the tank is filled, setting on an uneven
(non-planar or not level) surface/stand. Even more common in specialty tanks
(not rectangular or square on the bottom). Stands for such often have such
non-planar, non level issues. Read here:
http://www.wetwebmedia.com/aqstands.htm>
The cracks do not extend completely through the acrylic sheets so I don't think
leaking will be an issue,
<Umm; no. DO NOT FILL this tank w/o correcting these. VERY dangerous should this
tank fail catastrophically; with it MAY DO>
but I'd like to do anything possible to prevent that the cracks from growing and
become a problem. What would be the best way to repair or mitigate this damage?
<... some folks (we used to fabricate) might try applying a low viscosity
solvent... e.g. Weld-On 16 to the joints, cracks, in the hope of "filling them
in", re-joining the areas. I would NOT DO THIS, but instead have a professional
shop cut and install acrylic doweling of at least one inch diameter in all
linear seams inside. Read here:
http://www.wetwebmedia.com/acraqleaks.htm>
My current plan is to try and repair the seam by injecting IPS-4 acrylic solvent
into it using a syringe with a small gauge needle and applying light pressure
with a bar clamp.
<No need for a clamp>
I've also ordered some 3/4" acrylic right triangle rod to solvent weld into the
interior corner to reinforce the entire seam from top to bottom.
<Yes to this, but I'd make it a minimum of 1">
I'd be grateful for any advice you have as to these plans or any better course
of action. One particular question I have is what would be the best method for
welding the triangle rod reinforcement into the interior corner?
<Carefully measure, cut, practice fitting in all pieces, apply braces to keep
added pieces in position, use capillation to fill in the voids. IF all is cut
and placed properly, the solvent will fill the gaps>
Is there a particular type of solvent or method for applying it that you
recommend since the piece has to go in vertical?
<... Yes; the Weld-On line>
Would capillary action work or would it be better to try and find a more viscous
solvent that could be applied before putting the triangle rod in place?
<Capillary action will do>
What would be a more viscous product that I could use? Would IPS-40 be
appropriate here?
<For me, the lower viscosity>
Is there any other actions I could take to repair or reinforce the tank?
<Yes; to MAKE SURE the stand is LEVEL AND PLANAR; DO the repairs, bracing work
ON THE STAND if practical>
Any advice you have would be very much appreciated!
Thanks,
Casey Alexander
<Unless you're very handy (whatever this is... good mechanical skills, vision...
I no longer have), I'd seek experienced help w/ this repair. Bob Fenner>
|

 |
|
Re: Fwd: 6/22/17
Bob Fenner,
<Casey A>
Very grateful for your reply and advice. I'll let you know how it goes.
<Ah, thank you. Bob Fenner>
Thanks
|
Re: Acrylic seam repair 7/5/17
Bob,
<Casey>
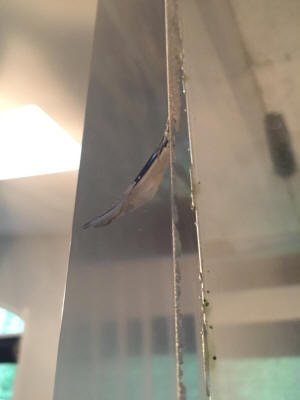
I’ve started repairing the damaged seam on my acrylic aquarium. I was able to
inject solvent into the damaged area fairly successfully using a 31 gauge
insulin needle (see attached picture). The white hazy area where the seam was
coming apart has now been reduced by 80-90%.
<Looks MUCH better, yes>
I had also ordered some triangular acrylic rod for doweling the interior corner.
When the material arrived, I believe due to it being extruded, the sides were
not perfectly flat and it did not fit tightly into the corner.
<Do turn it... two sides SHOULD be flat; square doweling is>
I tried machining the sides flat using a router table. I used some of it on one
of the back corners of the tank (that won’t be very visible) as a test. I was
able to get decent adhesion, but not perfect and certainly not a totally clear
weld. Would this likely have come from an imperfect fit?
<Yes; easily. Sometimes using a thicker solvent will/can fill in these non-flush
areas better>
You recommended using square rod for the reinforcement. Can you recommend a good
supplier with rod that is good and flat on the sides?
<Mmm; I cannot... outside of where I live (San Diego, S. Ca.) I don't know...
the brand names for such. You might call ePlastics re: (858) 560-1551>
Also, I was wondering if painter’s tape can be used to protect the nearby areas
from solvent drips?
<Sorry; I don't know this either; but worth trying... perhaps laying some other
sticky plastic tape on top of the painter's tape in turn?>
Thanks,
Casey
<Welcome. Bob Fenner>
|
 |
|
|
Acrylic Aquarium Repair 4/15/17
Hello there and thanks for providing such an informative website! I purchased a
used acrylic tank whose condition is a bit rough, it’s 150 gallons 72”x24”x20”
3/8ths thick sheet pretty standard stuff. Anyhow I could really use an expert
opinion on whether this tank will require dowelling after I re-solvent the
separated chemical welds.
<Yes; I would apply doweling here. My rule of thumb is anytime, with the whiting
out anywhere, that more than half the joint is troubling... to do so. Plus the
nearby crazing worries me.>
If so must I use cast acrylic or can an extruded rod be utilized for the
dowelling?
<Either will be fine here; for this application.>
Furthermore when do you recommend using weld-on 3 versus weld-on 4 for
re-solventing?
<Both are close to being about the same viscosity. I like "runnier" for tight
areas, brand new material in general>
The enclosed photo is of the front upper left corner, and is by far the worst
corner of the aquarium the rest of the tank is surprisingly not so bad. Thanks
for providing information that allows a regular working guy to afford his dream
aquarium! Thanks David
<Welcome! Bob Fenner>
|
 |
|
Re: Acrylic Aquarium Repair 4/16/17
Hi Bob thanks for getting back to me so fast, in your response about
dowelling the corners you mentioned the near by crazing worried you
how so?
<Evidence of stress there... could be from poor matching of joints, uneven
stand, weak acrylic.... But points to the need to add the doweling>
With the additional dowelling should I worry about the crazing?
<Less so>
I thought it was minor you can't feel it at all, but then again I’m no
expert. Thanks
<Welcome. BobF>
Re: Acrylic Aquarium Repair
4/17/17
Got it, I will weld up a steel stand with a 1 ½ butcher block top to support the
tank properly; dowel all internal corners, and re-solvent the bad seams. Thanks
for the sound advice!
<Very glad to share. Bob Fenner>
Acrylic Aquarium Seam Failing ...Did I make it worse?
10/10/17
Thank You all for the FAQs on acrylic aquarium repair.
<Welcome Chris. Am very glad to have accumulated these>
Your site is sure to become a valuable resource for me. I have a used 325 gallon
2mX80cmx80cm acrylic tank. Some of the corner seams have the white crescents and
other irregularities which look exactly like those on the
photos on your site at:
http://www.wetwebmedia.com/acraqleaks.htm
FAQs on Acrylic Aquarium Repair and Modifications: Leaks
...<http://www.wetwebmedia.com/acraqleaks.htm>
www.wetwebmedia.com
Acrylic Aquarium Repair 4/15/17 Hello there and thanks for providing such an
informative website! I purchased a used acrylic tank whose condition is a bit
rough, it ...
I had outlined some of the crescents in marker when I set up the tank in Dec
2015, and noticed yesterday that many had grown considerably and are
approaching the interior edge of the seam.
<No bueno>
So I drained the tank about 60% and used a locally-available water-thin
plastic solvent in the white areas of the seams (dripped in with a needle
applicator) .
<... while the tank had water in it? Yeeikes... the solvent could melt the
existing bond!>
I could see the solvent quickly spread by capillary action, but the areas
remained white.
<Yes... may be too "whited out" to make a clean joint again... NEED to
empty, dry... apply the most viscous Weldon (or equivalent) you can get, tape
over the applied areas to give the solvent time to work>
Oh By The Way...I live in Japan. So none of the labeling on the solvent that I
used is in roman letters, so I cannot tell exactly what chemical it is.
I am going to try and obtain some Weldon 4. But first I have some questions:
1. Must the white areas turn clear to be fixed?
<Mmm; no... but the "clearer they are", the more fixed>
2. Have I maybe applied a barrier to the Weld-on 4 being able to make a bond?
<Ahh, yes!>
3. Is Plexiglas similar enough to tank acrylic to test adhesives? IE if it works
or does not work on Plexiglas, will it work or not work on acrylic?
<The terms acrylic and Plexiglas (both PMMAs) are often used interchangeably.
Solvents, tools, methods for one should work on the other.
http://akriform.se/en/news/plastic-acrylic-and-plexiglass-we-explain-the-difference/>
Thanks in advance for any advice,
--Chris
<Welcome. Bob Fenner, who WOULD re-read what we have on WWM, and LIKELY install
the square Plexi doweling as gone over here>
|
Acrylic tank lifespan 3/30/17
Hi, I am rather humbled to ask, but what is the "lifespan" of acrylic
aquariums for both larger and smaller models? I ask because I have been
in the tank maintenance business for 25+ years, and some of my clients
tanks are that old or older.
<A well-made system of small/er size (hundred gallons or so) should last
twenty years or more if kept on a level, planar stand>
Also, if an acrylic tank starts to get the "cloudy spots" in the seams,
or any other tiny leak, will those seam leaks grow?
<They will unfortunately. IF there are whited out areas that approach
half the seam width, a good idea to drain, have corner doweling
solvented in all inside seams>
Thank you in advance
Bill Thomas
AquariumsW
<Welcome. Bob Fenner>
|
140 acrylic aquarium; concern re defects
1/21/16
Hello,
<Howdy!>
So I purchased a 140 gallon Acrylic aquarium off crag list for $400. The
dimensions are 60x18x30, my question is should I worry about these I don't know
what to call it other than anomalies in the panes which I guess is called a
joint. I have never had an Acrylic aquarium so I have no idea but I'm worried
after a little research on how to remove scratches lead to reading about
catastrophic failure .
Thanks Manuel
<The bit of hazing, scratching is not problematical; and the blem in the joint
looks fine from the one pic you sent. Does the "whited out" area extend far into
the joint? (when seen from the direct on view?). If more than a quarter way
through, ahead of filling I would fill w/ a low viscosity Weld-On product as
gone over on WWM.
Otherwise I'd use this tank as is.
Bob Fenner>
|
.JPG)
|
Re: 140 acrylic aquarium... no rdg.
1/22/16
Ok, thanks again for you input it's much appreciated . The whited out area you
speak of do you mean like a blotch spot?
<Yes; these are vacuolations... areas where the solvent is/has failed twixt
panes>
The panes are 5/8" thick
<Plenty thick>
, the guy I bought it from said the blotches are just cosmetic but I have my
doubts.
<Can be more.... you didn't read....>
My only concern is the tank being safe to setup in my living room and not worry
about walking in a small pond one day. I provided one more picture of the right
side of tank.
<One last time (with a twist) HERE:
http://www.wetwebmedia.com/acrsolvents.htm
and the linked files above.... it's like a jingle. BobF>
|
.JPG)
.JPG) |
Re: 140 acrylic aquarium 1/23/16
Got it went over it very helpful.
<Ah, good>
To get a better idea of how this happen , I'm guessing the blem is a result of
the outer seam not bonding or unbonding ?
<Un; yes>
If I use the tank as is, in your opinion will it be fine until I save enough
money to buy a new one with the same dimensions ? About maybe six months to a
year?
<Yes; highly likely; though... as prev. stated, and listed a few times in our
archives. T'were it me/mine, I'd opt instead to "fill" the whited out areas w/
solvent (while the tank is empty)... B>
Thanks again Manuel.
|
|
Acrylic Tank Question; seam going
6/15/15
Hi guys! Thanks for the website and the info--due to some (possibly overly
paranoid) worry I have, I wanted to send you an e-mail about a tank I just got.
Picked the tank up from someone who was looking to get out of fishkeeping, he
had it for several years and never had any issues with leaks and despite being
on a stand that I don't think was the best (large gap in the middle so it wasn't
supporting the entire bottom of the tank, which we would be reinforcing), there
wasn't any bowing going on. I think the brand was SeaClear, unfortunately only
3/8" thick which seems to be pretty standard for these mass produced tanks, and
there is some noticeable crazing with a few spots that made me a little uneasy.
I'm not super familiar with acrylic tanks, but I wanted to send some photos of
the spots I mentioned to see if I'm just being paranoid or if there is serious
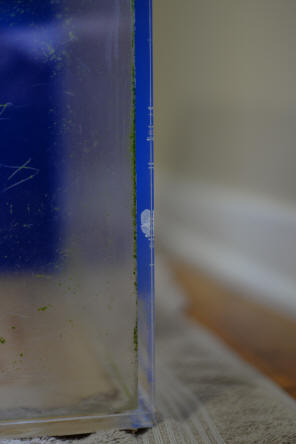
cause for concern.
<The whited out area labeled Right Bottom is (too) bothersome... While the tank
is out, clean, empty... I would use a water thin solvent... such as: "SCIGRIP 3
Acrylic Solvent Cement, Low-VOC, Water-thin".... applied with a small squirt
bottle with needle applicator... will take just a drop... into the seam/gap
here>
For as long as he had the tank, there were no issues, no leaks, bowing, or
anything like that and he kept an Oscar, a Parrot, a Firefin, two Plecos, a
number of pretty decent sized rocks/ornaments and a lot of substrate for several
years without any issues. Am I getting worried over nothing?
Thanks
guys!
<All such "bad areas" that go this deep into the seam are definitely worth
worrying about, and fixing. In this case, likely just by re-solventing the
area/s... In more advanced cases by fitting in square doweling (of acrylic;
check that the corner inserts are 90 degree angles; i.e. NOT concave), with
heavier bodied (Weldon 16 my fave) solvent... in all internal corners...
Bob Fenner>
|
 |
|
Re: Acrylic Tank Question 6/15/15
Yeah, the impression I was getting from your site and others was that using the
two products you mentioned would help fix the problem, with the latter applying
to tanks that looked worse than ours.
<Yes>
If we just use the Weld-On 3, how long do you think could we reasonably expect
the tank to last without fear of leaks/bursting?
<IF the white out completely disappears, indefinitely>
Thanks so much for the response, Bob :D
Mark Hemmert
<Glad to share. BobF>
Re: Acrylic Tank Question 6/15/15
Is the solvent anything we could buy locally, or is our best bet to order
online?
<You might get lucky and find someone who sells nearby... like an acrylic
fabricator, outlet... Most folks have to order. B>
|
|
Acrylic crazing
5/8/15
Hi, I have a standard 180 gallon marine aquarium, 6 x 2 x 2. Acrylic is 1/2 inch
thick with heavy Eurobracing. The tank has been running for one year.
After hearing about crazing and tank failures
<Mmm; not from crazing; no>
I noted some crazing on my tank mostly on the right seem towards the top. See
picture.
<Oh! This is a seam issue, not crazing really... your MEK joint weld is
partially failing. Still... it doesn't appear to be "that bad">
The tank is finally looking great and I would hate to tear it down, but can't
take the chance on a failure either. Would love an expert opinion. Thanks Mark
http://s266.photobucket.com/user/Medicmark737/media/craz4.jpg.html?sort=3&o=17
<T'were it me/mine, I'd leave as is... IF the white-out areas move to half the
seam however... In the meanwhile, I would send along this pic to the
manufacturer, fabricator for their input. Bob Fenner>
|
 |
|
Re: Acrylic crazing 6/9/15
I bought it off CL. It was 6 years old but never setup by the owner, so no info
on manufacture etc.
<Mmm; and I don't recognize the design...>
Thank you for the prompt reply. It really helps.
Mark
<Glad to be of help to you. Again; I would not worry, not take this tank down.
Bob Fenner, whose employee-owned corp. used to do such work>
|
|
Acrylic tank; blem., stand/level concern
12/31/14
I wanted to ask you guys a couple questions. I have a 1200
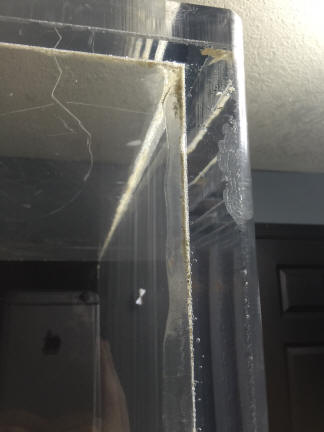
gallon 1 1/2" acrylic tank. The seems look ok with some
crazing. I have included a pic at the top of the front panel. It is
about 1/2" wide so it is still leaving about an inch of bonded space.
<I see this "blem"... and suggest you or someone try a low viscosity
Weld-On product or equivalent... to fill in this gap>
Should I reinforce this or is this ok if the rest of the tank is normal?
<Because it is near the top, its shape, size, not likely a problem ever;
but I would still try capillating in a wee-bit of solvent here.
Take care NOT to drip excess... perhaps a bit of blue tape around the
area lest there be run-off>
The tank dimensions are 10'x4'x4'. My last question is
I talked to an engineer and my tank is level side to side but
from front to back (4' side) it is almost a 1/2" unlevel.
<?! What?... I really, make that REALLY don't like this... measure the
panels... length and width... is/was one side actually mis-cut this half
inch?>
He said this was about an extra 100lbs on that panel but should be
fairly insignificant to the rest of the tank. He said it should be fine.
Do you agree with this? Thanks.
<"Should be fine" in that the tank should not catastrophically fail,
yes... but if this were some tank our old company had fabricated, we
would not ship it; and if I paid others to make it; I'd at the very
least extract a ten year warranty against leaking or failure... if not
sent it back. Bob Fenner> |
 |
|
Re: Acrylic tank
12/31/14
Thanks for the responses. I probably phrased the question wrong. The tank is
all the same size, just my floor has a slight decline causing the tank to
lean slightly.
<Ahh; still a concern. I'd be making sure the floor underneath is strong
enough by far... AND shimming up whatever support you're utilizing to spread
the mass of this set up about, above or below floor>
The tank side to side is level but because the concrete
<Oh! On the floor side then>
is slightly going down hill, the water level is about 1/2" higher in the
front of the tank than the back. So over 4' it has a 1/2" decline. Is this a
problem or was the engineer correct in saying the panel will hold about
100lbs of water extra and shouldn't be a big concern?
<It is FAR better for you to make sure the tank is level AND planar. Have
you read my article re stands on WWM?>
Thank you.
<Welcome. BobF> |
|
A Question about Acrylic Tanks
11/15/14
Hi,
<Ray>
We just has a 150 gal custom acrylic tank fabricated for us. The
one side seam has bubbles trapped in the entire length of the seam,
pictured below.
<... poor technique applying the solvent, filling the gap>
The acrylic material is ¾" so I don't think this is a structural or leak
issue but one of cosmetics. Is this typical of acrylic tanks or
unacceptable?
<Mmm; not typical or desirable... >
The tank cost upwards of $4k.
<Well... likely to "be okay" in terms of the tanks integrity, holding
together... IF only on one seam... I might have the fabricator install a
support in the one/two corners (along the entire run) AND turn the
tank's back to the wall (if being installed against one)>
Thanks you in advance for your opinion.
rsf
<We used to fabricate up to 2"... would not allow such work out of the
shop. Bob Fenner>
|
.jpg)
.jpg) |
|
Re: A Question about Acrylic Tanks 11/15/14
The tank is free standing in the middle of a room. There is some millwork
under and above but out in the open.
Ray Fischer
<Uhhh! I would not then (for appearance-sake) install the corner bracing...
BUT would extract a longer-term (five-ten year) guarantee from whomever
fashioned this tank. Don't know what they used to "off-set" (this statement
for browsers) the panels to be welded, but I would have used small piano
wire sections. Cheers, BobF>
Re: A Question about Acrylic Tanks 11/15/14
Hi Bob F
So your telling me this is acceptable and I should pay for the tank?
<WITH the stated warranty, yes. B>
Thanks,
rsf
Re: A Question about Acrylic Tanks 11/15/14
Thank you very much for your time
Ray Fischer
<Welcome.>
Re: A Question about Acrylic Tanks... seams/solvent
11/17/14
Hi Bob F,
<Hey Ray>
Thank you for your help. The tank fabricator is stepping up to the plate. He
is sending a rep up to correct the problem.
<Please do make known his and your further impressions. BobF>
rsf
|
Internal overflow leak 5/29/13
Hello aquatic experts,
I'm sure this question is answered somewhere on your site but it has
defeated my attempts to find it. I have a built in overflow that has a
small leak at the bottom. The leak is between the overflow and the tank
so no water gets on the floor as long as the power stays on. But since
the leak causes the overflow to equalize with the tank any power outage
will drain the tank about 6 inches, which is more than my sump can
handle.
<Have to get a larger sump (volume) and leave the water level down
there...>
I currently have the pump off, and closed the return valves so this can
not happen but I would like to get my tank connected to the sump again.
Is there a way I can seal this leak without draining the tank?
<A couple of standard approaches... there are epoxies... that can be
applied/reapplied around joints, with or w/o another piece of acrylic (I
take it as the material of construction... there are repairs for glass,
PVC...). All require draining the tank... You may want to consider
inserting an overflow pipe, pushed or threaded (if the
bulkhead/through-put fitting on your tank is threaded)... Raising
it/this to near the height/level of your overflow teeth>
Both the tank and the overflow are acrylic. The
overflow is in the middle if the back wall and goes from the base of the
tank up, with the holes in the bottom.
The leak is somewhere along the bottom edge where the overflow meets the
base but I do not know exactly where.
<Again... likely just thicker, more viscous (less fluid, more molasses
like) Weld-on is the route I'd go>
Thank you for your assistance.
Ej
<Take your time here... planning, containers, friends to help hand out
the gravel and rock... can be done in a few hours time with all tools
and materials on hand... Oh, and DO get the larger and/or additional
sump for transit volume, test (unplug pump/s) to assure it won't
overflow. Bob Fenner>
|
Acrylic tank crazing in seams – 5/22/12
Hello,
<Cindy>
First, thanks for all the useful information your site provides. I
have read the information currently on the site for acrylic tank
crazing/cracking issues. I have a 64"l x 15"w x 24"h Clear for
Life tank which has 3/8" acrylic. Bought it used so I do not know
it's age. It had only very few minor scratches, no cracks, but
some crazing in the seams.
<Mmm, not crazing... but vacuolations... spaces/gaps where the solvent
(during construction) didn't flow to, seal face to face. Happens when
sheets aren't square, and/or not held close (enough) together while
solventing>
I have never had a take this large or an acrylic one. Tested for
water tightness before setting it up and no problems - minimal bowing
when filled. Top brace looks good. I have set the tank up
and the crazing in the seams is concerning me.
There was some in the bottom seams, but very little. My real
concern are the side (vertical) seams along the colored rear acrylic
piece. I have enclosed two pictures of the most affected seam.
I have had the tank set up a couple of months, and although the crazing
does not appear to be growing, but either I did not notice the cloudy
fading horizontal bands layered up the seam (blue to lighter cloudy
blue), or it now has those cloudy bands.
I really need someone else's opinion of whether this is minor or could
cause a failure soon. The hood that is one the tank is very heavy
and I am wondering if this could be an issue?
<Not likely; no. This tank is good for many years of use>
It appears to be like most tanks that
have a wooden/particle board stand and hood to match.
Cindy
<Thank you for sharing. Bob Fenner>
Re: Acrylic tank crazing in seams – 5/22/12
Thanks - didn't notice my typos until I read this back - sorry.
Cindy
<Welcome; no worries. BobF>
|

 |
|
Large Acrylic Aquarium Seams- Did I Buy A Problem?
2/13/12
Hi, we recently bought a large (300+ gallon) acrylic 1 inch thick
aquarium with center back overflow and nice steel stand. It has a
black acrylic back, is a nice deep shape, is 30" tall and
was not super cheap and is a hard to find shape (would not feel
happy throwing it away or putting a free sign on it). I just
noticed that some of the seams are not clear.
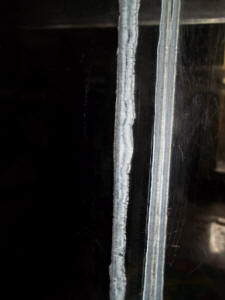
<I see this/these>
Many are but quite a few are not. The previous craigslist owner
said it did not leak at all. We have not filled it with water yet
because I wanted your feedback first. We looked for pictures that
looked like ours with what to do but did not find much, so am
sending the email.
I'm attaching pics for your feedback.
To describe the pictures I attached: Many Seams- quite a few look
like this Middle Left- towards the bottom of the picture shows a
whiter area of the seam Middle Left 2- shows the same area in the
back left of the photo Middle Left 3- close up of the same area
Top Seam- is a picture of an area of the top seam
What is your thought?
<I'd install square doweling (solvented) in all inside
seams. Read here re:
http://www.wetwebmedia.com/acraqleaks.htm
And if repair is needed where is good in southern California (we
are not capable ourselves) and is it worth it?
<See the "Yellow Pages" (analog and/or electronic)
re Plexiglas/Acrylic... you'll find sellers of tools and
materials, and fabricators... contact them re this repair if you
don't want to attempt it by yourself... IF you know and trust
a competent retailer (petfish) that does such repairs, ask them
re>
And your website it a great service, we've used it before for
research.
Thanks, Worried in So Cal
<Cheers, Bob Fenner, in not-so-sunny San Diego>
|
   |
Clarity Plus Lifetime Warranty? (and acrylic tank
resurfacing/repair) -- 01/07/12
Hello,
<<Hey Garrett>>
I have recently purchased a 300 gallon acrylic aquarium from c-list for
a couple bucks and thought I was getting a real deal.
<<Mmm, is often the case'¦till one sees the scratches.
But even so, this can still be a 'deal' if you're willing
to apply some elbow-grease. Returning the tank's clarity is not all
that difficult>>
and I may have if I don't count for my labor resurfacing the
tank.
<<Ah!...yes>>
My question is and it's a three part'er; how would one go about
contacting the aquarium manufacturer being Clarity Plus (SeaClear, the
Casco Group and so on) to attempt to cash in on said warranty?
<<If this tank has been modified or repaired (other than
authorized) in any way, it's likely the warranty has been
voided>>
I cannot find any contact info for them anywhere. Wondering if maybe
they shut their doors?
<<Hard to say'¦their products seem to still be on offer
though. You might try contacting a retailer selling their product, such
as FishTanksDirect.Com>>
Second question:
Assuming I am not lucky enough to cash in on that warranty and continue
doing the work myself, how clear is clear enough for acrylic?
<<'¦? You would be surprised at what
'disappears' when water is added to the
tank>>>>
I have dry sanded from 120grit up to 400grit and then wet sanded from
400-4000grit and come back with polishing compound and have gotten it
very clear.
<<This is likely sufficient'¦adding water will
tell>>
However there still appears to be distortion from a few feet away.
<<Mmm'¦ This is from not sanding 'evenly' across
the entire surface of the panel'¦or at the least
'feathering out' the perimeter of the sanded areas. Failing to
do so creates what is called a 'lensing effect' and results in
the distortion you are now seeing>>
I can place a book inside and still read it but can't read it
looking through both panels (just a test for clarity no intentions of
reading underwater).
<<Indeed'¦kind of like trying to read through two
stacked glasses lenses>>
Is the distortion because I boogered-up the restoration process on the
acrylic
<<A likely scenario>>
or because the tank has some age and permanent-bowing to it?
<<A less likely scenario>>
Am I worrying to much and water will fix it?
<<Possibly'¦I would test and see'¦is possible
the lensing effect is not that noticeable/within acceptable viewing
limits>>
(have not finished the resurface part yet to retest clarity with water,
but don't want to waste my time if its going to look like poop)
Third question:
The seams of the tank in various places around the tank have turned
whitish in some spots. Almost like there is frost or ice between the
panels. None are very large maybe 2' at the most , but they do span
the whole 1/2' of acrylic. Never owning an acrylic tank I don't
know the risks involved.
<<Minimal'¦but again'¦a water
test'¦>>
It would be my assumption that the chemical bond broke there just
isn't leaking (have done a 2 week leak test with litmus paper on
the seams to verify leaks).
<<Then you likely don't have a worry re'¦but while
the tank is empty and dry you can easily beef-up these inside corners
with triangular acrylic doweling>>
Do these need to be shored up with the square braces as suggested in
other posts or can I take a needle with solvent and forces it in the
joint? Or something along those line?
<<My choice would be the acrylic doweling'¦applied very
carefully; to avoid any further marring of the viewing surfaces, with a
'thickened' acrylic solvent like Weld-On #16 or Craftics
#33>>
Any and all answers and suggestion will be greatly appreciated.
<<I hope I have served>>
Thanks,
Garrett Crance
<<Happy to share'¦ Eric Russell>>
acrylic tank, imperfections in joints
12/16/11
hi, huge fan of this web site, essential reading for fish keepers.
Think I've got a problem i need advice on, just purchased an
acrylic tank 48"Lx18"wx26"h. its made with cell cast
12mm acrylic. On inspection i noticed lots of small 1/2mm
bubbles on seam. there mainly on external edges but not just a
couple. I've spoken to the producer and he's said its normal
and wont effect strength much but I'm concerned about filling it
and will the life expectancy be reduced?
<Mmm, you're likely okay here in the short and long haul. The
quality may be a bit less, but this tanks should still function for
decades. Bob Fenner>
Re: acrylic tank 12/16/11
thanks for speedy reply Bob, will fill it tomorrow and hope for best.
Would siliconed external angle beads add any strength
<Almost none. Not worthwhile>
or am i better off leaving be so i can keep an eye for whitening or
crazing on these bubbles. thanks again.
<Welcome. I strongly doubt you will have problems w/ these seams.
Cheers, BobF>
180g acrylic tank... cloudy seams concern
10/28/11
Hello,
<Douglas>
I am finally getting around to setting up my 180g Clarity Plus
aquarium.
I have had the tank full for the past week doing a "leak
test" prior to putting in my living room without any signs of
leaks.
<Good and good>
I inspected the seams, and I think they look ok and fairly clear
however on the vertical front seams (where the front & side panels
join) there are some cloudy / bubble like imperfections, almost looks
like frost on a windshield? The spots don't run across the width of
the seam itself, and there was no evidence of a "whiteout"
cloudy area across the entire seam. The imperfections are more
prevalent on the outside edge of the seam, but is difficult to tell how
far the extend across the seam - perhaps 1/2 way in 2 small spots but
in most spots they look to < 1/4 of the way across the seam.
I didn't notice the spots getting worse over the week the tank was
filled.
I tried to take a photo, but given the way the front panel is rounded
off as it meets the corner it was difficult to get a good picture.
Obviously with a 180g tank the last thing I want is a leak in my living
room, from your experience working with acrylic is this normal and what
is the risk of separation that would cause a leak?
<Some small risk>
As a precaution do you
think I should have the inside seams of the tank reinforced with
1/2" acrylic square tube by a local plastics shop?
<Up to you... for the long term; yes>
Thanks again for your time & help
Doug
<Glad to share. Bob Fenner>
Re: 180g acrylic tank 10/28/11
Hello-
<Hi there again>
I mistakenly added my phone number at the bottom of the last email I
sent you, please delete if you decide to post it thank you!
<Oh yes; I mean no... We don't retain or reproduce folks'
contact info. w/o their express consent/urging. Cheers, BobF>
Doug
poor seam 6/5/2011
Hello; I have a 600 gal saltwater tank. One seam on a
1" X 1" acrylic 3' high corner has a
cloudy look half way up. .The rest of the seam is
still clear as well as all other corners. The tank is a 2 year old
reef-fish with many critters so emptying it would, I'm afraid, kill
some of my friends although I will if there is no other solution.
<There is none>
I was thinking of welding a strap down the seam
<This IS what I'd do... in ALL the inside seams... square
acrylic doweling is available... Solvent this in place with flat sides
to the two edges>
but then to make it look uniform I would have to do the same to the
other corners.
<Yes... Again, best to do now for ALL inside seams/corners>
The corners have a 3/4" radius so I don't think I could wrap
around the corner and get a good weld.
<INSIDE, not out>
(also I don't have the knowledge to heat the acrylic to bend it
)
<Just measure carefully and cut to abut>
The tank is very odd shaped ( like looking down on an H with a tub in
one end of the H and a shower on the other with the aquarium as the
walls ) plus there are straps welded across the top tying each side of
the H together. What I'm wondering is there a way to mend that seam
without emptying the water or any other solution?
<No; not>
Does the #40 epoxy weld under water?
<No>
Dan
<Good luck w/ your project. If it were, mine, I'd get some
experienced help. Bob Fenner>
240 g acrylic repair question -- 10/19/10
I've got a 240 g acrylic tank that I just filled with water for the
first time and when halfway filled I noticed @ 0.5 ml of water on
inside corner bottom panel seam of internal overflow box. Can I just
silicone it from
the inside of box? It doesn't leak to outside of aquarium just to
inside of rear corner overflow.
<You can try this... Silastic doesn't stick well to acrylic...
but if it/this is only a pin-hole leak w/ little pressure... this fix
might work.
Do make sure the surface is completely dry and clean ahead of applying
the Silicone. Bob Fenner>
135 gallon Clear for Life acrylic aquarium, seam-dowel
repair/strengthening 3/16/10
Hello everyone!
I have a problem or worry about a future problem. I bought a 135 gallon
Clear For Life acrylic tank about 4 years ago. the typical 72x24x18 at
3/8" to cut cost tank. It was setup fresh for a few years and when
I moved I never set it up. Well I decided to setup a ray/shark tank,
until they outgrow it. When I got all of my other equipment together, I
filled it, and after the system was running for a minute (literally a
minute) the rear right seam blew and flooded my living room.
<Yeeikes!>
I got about half of the water out into my yard instead of my carpet.
After contacting advanced aqua tanks they repaired that seam by adding
a corner brace at the bottom and up the side.
<Yes. A/the common approach/repair>
I brought it home and filled it with fresh and it held. It did the
usually bowing but I am seriously concerned about it happening again. I
have read pages and pages about acrylic tanks and I can tell you that
it does not have that much crazing as my 125 Uniquarium(which is a
whole other problem). My
ultimate question is about using weld-on or a similar product to
strengthen the seams before I set it up.
<?... only to anneal more corner doweling...>
I read one of the last questions, Re: Acrylic Tank Crack
Repair/Drilling Acrylic -- 12/31/07, that someone recommended it that
maybe it would apply to my situation as well. I don't want to do
something that could weaken an already weak joint.
<It would to only add it to an existing/old bond>
Also, if you do recommend it, after it has cycled transfer my
inhabitants of my other tank to and do the same to the Uniquarium. As I
mentioned it is a lot worse off where the crazing goes completely to
the interior of the back panel of the sump area.
<I would NOT simply apply solvent to a crazed area... DO look into
sealing square acrylic rod, cut to size, in the inside joints>
I have other questions about the sump setup and return of the 135 but
until I read those articles I will leave them alone.
Thank you for your time.
James B
<Do "chat" w/ others who have done this
modification/addition... perhaps have them help you one on one. Bob
Fenner>
Re: 135 gallon Clear for Life acrylic aquarium, leak
repair f' 3/17/10
Thanks for the direction! I contacted a local Plastics store and they
carry Weld-On and will cut pieces to fit the interior dimensions to
Weld-On to. No pun intended. In the corner where the overflow is, would
I want to adhere the joints that are in direct contact with the
water(the show side) or opposite?
<All inside joints>
Would it be wise to do this to the bottom joints as well, while I am at
it?
<Yes>
In the end I want to jump to a 180 Hex
<Unsuitable shape and volume>
for the shark and rays but until then, I'm stuck.
James B
<BobF>
Re: 135 gallon Clear for Life acrylic aquarium...
repair and system for Chondrichthyans -- 03/20/10
Thanks for the direction! I contacted a local Plastics store and they
carry Weld-On and will cut pieces to fit the interior dimensions to
Weld-On to. No pun intended. In the corner where the overflow is, would
I want to adhere the joints that are in direct contact with the water
(the show side) or opposite?
<... all inside joints need to be done>
Would it be wise to do this to the bottom joints as well, while I am at
it? In the end I want to jump to a 180 Hex for the shark and rays but
until then, I'm stuck.
James B
<You sent this before... A hexagon shaped system of this volume will
not work for these fishes. BobF>
Acrylic Tank Repair Question -- 12/14/09
Hi,
<<Hello>>
I recently purchased a 4ftx2ftx2ft ½' thick acrylic
aquarium. It was made by a local who claimed it was leak proof.
<<I'm sensing this is not the case'¦>>
Well I took it home and it leaks around the bottom in one of the
corners and about 6-8' along one side bottom seam.
<<Uh-oh'¦sounds like reason enough to return it to
me>>
I can also see a lot of little bubbles in the seams. As well he
didn't square up the tank perfectly and one of the sides sits out
1/6' off the bottom sheet. I am wondering if I should try to use
some Weldon 16 and go over all the seams or if I should just get rid of
this and find another?? It is brand new but leaks!!!
<<If the joints have been well enough assembled originally to
keep this tank from simply bursting apart when filled, you can likely
salvage it by solvent-gluing some angular acrylic rod along the seams
(there is such made for this type application, see the Net re). I would
suggest not trying to 'spot-fix,' but rather, glue the
filler-rod along the entire inside bottom perimeter.
Although'¦being a new purchase, why not return it for a
refund/replacement?>>
Thanks,
Matt Thomas Utah
<<Happy to share'¦ Eric Russell SC>>
Livestock Acrylic Tank Leaking 10/2/09
Hey Crew. I have an acrylic tank that is holding livestock that is
leaking. I've been reading through the site and only see
suggestions on sealing leaky tanks when they're dry. Is there a
solution to seal an acrylic tank when it has water in it?
Thanks!
Ryan Mullinax
<Not really Ryan... Some "not real" repairs can be made
short term... wedging a piece of flush square stock (rod) into the area
of the seam leak... with Silastic... but really... the tank needs to be
dried, resolvented. BobF>
Re: Livestock Acrylic Tank Leaking
10/2/09
Ok, thank you Bob. I really appreciate the knowledge and experience
that WWM provides the aquatic community. It has benefited me greatly
over the years.
<Ahh! Am very glad for this. Cheers, BobF>
1" thick acrylic - Can we fix it? 9/27/05 Hello, I
couldn't find a similar problem to mine except ...leak leak...
leak. I have a very large 500+ gallon tank. It's 1" baked
acrylic on all sides. I have saltwater in it and have had it for like 6
- 7 years. It's completely built in to a wall and is supported on a
steel structure. We noticed some water damage on a piece of quarter
round that was trimming it and when we removed the trim water started
spurting from a pin hole leak. The trim was actually holding it in
check some what. I don't want to try and remove the whole tank from
it's location as it will cost major in carpentry. Will this acrylic
cement (northcoastmarines) work for this type of leak? How does this
type of thing happen after all these years? Kim <This tank can
likely be repaired... in place. Do look into square
"doweling" (this is sometimes only flush/ninety degrees on
two of the four sides... You must make sure the flush sides are affixed
to the corners. What needs to be done? Drain, clean the tank entirely,
cut the doweling to size to fit in all corners (yes, including the
sides), and solvent in... The extra bit of acrylic in the corners
won't be obvious in time. Cheers, Bob Fenner>
Re: 1" thick acrylic - Can we fix it? 9/30/05
Thanks so much but where does one find square acrylic (I assume not
just plastic?) "doweling"? Kim <Should be available, as
well as solvent/Weld-on and cleaner from a large/r plastics distributor
in your town... or mail-order... Use your "Yellow Page"
directory, the Net to find. Bob Fenner>
Cracked acrylic tank 9/20/05 Well Bob, You were right,
only give it time....I've got a new one for ya. My crew and I were
installing a new 36" x 30" x 36" acrylic tank from AAT
today. As the tank was being set down on the floor, one of them lost
their grip for fear of getting their fingers pinched. The right front
corner of the tank hit the bare concrete floor from about 2 inches
up....that's when I heard that unquestionable cracking sound. I saw
my profits disappear before my very eyes. However, upon inspection, it
wasn't nearly as bad as I thought. The crack is actually in the
bottom plate about 1/4" in just beneath where the front panel
(front and sides are one piece with bent corners) is welded to the
bottom panel, about 6 inches from the start of the right corner radius.
This crack extends from the bottom surface upwards about 3/4" in
an arching pattern, almost like a rainbow...but not nearly as pretty,
and finishes back at the bottom surface. Its a pretty clean crack and
does not go anywhere near where there would be water. I figured that
because it directly underneath the front panel, that even if it extends
further over time, it would eventually dead end into the front panel
and because its almost dead center under the front panel, that there
would be plenty of material to keep it from leaking. Your thoughts on
this ???? Scott C. Wirtz >>>Greetings! Sorry it took so long
to get back to you, things are crazy for many of us here on the
"crew" and tons of queries coming in. Bottom line, it's
impossible for any of us to say for sure about your tank. I had a
similar thing happen though to a 300 gallon tank, and it was just fine.
Good luck! Jim<<< <<RMF would still run a bit of Weld-On
(of lower viscosity) into the cracked area>>
Need advice on
separating acrylic sheets... 8/27/05 Hi Bob, <Ed> My name is
Ed Ruiz. I'm in SLC, Utah. Seeing your vast experience in the hobby
and working with acrylic I hope I can get some advice from you. <I
see> I recently acquired a lot of 1/8 and 1/4" acrylic sheets
(24"x48") that had apparently been stored under less than
ideal conditions. I find that the sheets are still with their paper
masking on, but between each two sheets there is a yellow or blue
textile material that is holding them together. My theory is that they
were heavily stacked (too many sheets atop each other for a long period
of time - <In the heat...> I got them for free) and the masking
textile's adherent has bonded rather strongly. I have not
insistently attempted to separate the sheets and would like your
opinion, advice or suggestions. I will use the sheets to build
aquariums for a hatchery project I am working on. Ed Ruiz <Very hard
to separate... inserting long, thin metal strips between and prizing
apart is likely your only option... though this will very likely
scratch through the protective masking... Have you tried speaking with
folks in the acrylic business? Manufacturers of such do have
websites... I would get their input before proceeding. Bob
Fenner>
Re: need advice on separating acrylic sheets... 8/30/05
Thanks a lot Bob, your suggestion is exactly my wife's' and
makes sense. <Ahh, good company> As to the acrylic
manufacturer's or vendor's websites, they're more
interested in selling me a product for taking the paper masking off.
This tells me they did not pay much attention to my enquiry in the
first place. I'll go with your advice. Ed <Please make it known
how this goes... Years back I tried to do this... with piano wire and a
strong friends co-help, jamming thin metal strips twixt the sheets...
and getting the old masking off... what a lot of work besides! I would
listen to the acrylic manufacturer's, distributor's advice re
this. Bob Fenner>
Acrylic crack repair, opportunistic/typical
Moray behavior 11/11/05 I just bought a used 55 gal hexagon acrylic
tank. I was moving it around trying to determine placement when I
realized there is a crack in the top panel. No point in finding blame
now, I just want to know if I can save it or take this as a loss.
<Mmm, can likely effect a simple repair here> The crack,
definitely not crazing since I can feel a separation, starts from a
corner round of the large cutout and extends about 3 inch toward one of
the six sides. One more inch and it is going to hit the side edge!
I've been reading about using Weld-On and applying an acrylic panel
to the crack. <Yes> Also is drilling a hole at the end of the
crack going to stop it? <Not likely useful, necessary> Can I get
Weld-On at Home Depot if I were to try this? <Best to seek out from
a "Plastics" supply... look in your local Business Yellow
Pages Directory re> Should I worry about this crack since it is only
on the top panel? <Mmm, not much to worry about, but I would solvent
it closed> The tank is a standard 55 gal hex 24x24x28. It's
funny how things go wrong and just seem to spiral even more. I bought
the tank intending to make it a new home for my white-mouth eel about
15in, who has managed to eaten two smaller fish. Well he attacked and
ate my 6-7 inch lunare wrasse last night. I couldn't believe he was
able to swallow the wrasse or even catch it. What a sight! Thanks
<Welcome... an easy project/fix... Bob Fenner>
Repairing acrylic leaker 3/7/06 Hello, We are searching
for someone who can fix the leak in the seam of our large (8'W x
4'H x 2"D) acrylic salt water tank. <<Eeek!! A difficult
challenge at the least!>> The owner has said that he sign a
waiver that relieves the repair person of responsibility if the repair
does not hold. <<While there are several ways that this can be
repaired, no sane repair person will guarantee this work. The best
looking and safest repair will require emptying the tank, cleaning out
the defect and filling the void with a two part polymerizing adhesive.
A cheap and aesthetically non-pleasing repair could be made by gluing
an acrylic splint inside the defect with two-part or solvent adhesive
after cleaning the area with sandpaper. >> The leak is small and
is coming from the front left seam, about half way up the tank. The
tank currently is filled to below this level and still has fish in it.
Can you recommend anyone that could take this sort of job on? Regards,
Jennifer Ferguson, Woodwork Creations <<I don't know of
anyone to recommend. Beware that any repair does not address why this
occurred in the first place... was the tank properly built to begin
with? Is catastrophic failure imminent? Was the stand out of level?
Personally, I would strongly consider replacing the tank with one built
by a reputable builder. Best Regards. AdamC.>>
Leaking Acrylic Sump...Silicone Not the Answer -
12/12/06 Hi and thank you all for your support and knowledge.
<<Hello...is our privilege to share>> I have had my reef
tank for over a year now with good success. I am attempting to build a
custom-size sump inside the stand of my 125 gallon running reef. I
purchased the 3/8" acrylic and had it cut to size so the fit seems
to be good. I used Weldon-3 in all of the seams. I then let it dry and
used Weldon-16 to form a bead around the seams. <<Hmm,
shouldn't be necessary if the pieces are bonded correctly with the
Weldon-3, but won't hurt either. If you really want to
"strengthen" the corners/seams, you could cement in
triangular shaped corner braces (these are offered/can be found
"pre-made" on the Net)>> I filled the sump with
½-inch of water and the water leaks out of the seams.
<<Mmm, perhaps the "fit" was not as good as you
perceived. For the Weldon-3 to work properly the joints must fit
precisely to allow the cement to be drawn-in by capillary
action>> I tried to put another heavy coat of Weld-on-16 and let
it dry overnight. This also leaked. <<Hmm...just spreading it
over the surface isn't likely to help as you've discovered, but
if you can "force" this thicker bodied cement in to the
joints you might be able to fill the gaps/leaks. If the leaks are
many/large you will probably have to either cut the pieces apart and
recondition the mating surfaces...or have new acrylic cut/prepped and
start over>> The acrylic shop said I should use 100 percent
silicone to fix the leaks because it stretches. <<A poor
suggestion/option in my opinion...the silicone will not adhere well to
the acrylic and though this may seem to work at first the silicon will
eventually fail and leak...probably when you happen to be away for an
extended period>> I read on your website that silicon is not the
best answer. <<Correct>> Do you think this will work only
for sealing the water and not for the structure of the sump? <<A
poor solution for the former and disastrous for the latter>> I
also noticed the Weldon-16 does evaporate so the seal does become much
thinner when dry. <<Yes, the cement shrinks as it cures>>
Thank you. Darrell <<I would try the thicker cement again, using
a finger run along the joint to force it in (do make sure everything is
"completely dry"). If you aren't able to seal the gaps
this way then your best/safest option in my opinion is to remove this
sump and rebuild/start anew. Regards, EricR>> <If this fails,
RMF suggests securing a length of doweling (acrylic) cut to fit in the
corners (I'd do all inside seams while you're at it)... With
the Weld-On... Make sure and examine the doweling closely... it is
often convex on two sides... you want the two flat sides against the
current acrylic panels.> Acrylics, leaks and silicone?
1/17/07 Hello<,> I have a question. <<Hello! We got
answers!>> I have a<n> older large acrylic fish
tank<.> <I>t has several leaks on the bottom where the seam
is<.> <<Yeeow! Talk about a bummer. Older, meaning
"out of warranty"? >> I tried to silicone the outside
but it made the leak worst <worse.> <<Two things. One: You
don't ever seal leaks from the outside. It just doesn't work
that way. Two: Acrylic needs to be welded to make a seal, using
solvents, not goops. A popular method of bolstering every seam in your
acrylic tank is to use acrylic dowels (square) and bond them to every
seam. This procedure and more available at: http://www.wetwebmedia.com/acrylictkrepfaqs.htm >>
<H>ow does <do> I fix this<?> <T>hanks.
William. <<You got it, W. -Graham T>>>
Cracked Tank Hi there Bob I just cracked the bottom of
my 180 gallon acrylic tank. Its okay it was empty. The crack maybe
about 10"long. I would like to repair this problem if possible.
Someone had mentioned to use "Weld On (I forgot the number) and
attach a new piece of plexi-glass to the bottom, he also said that even
if I glued the new piece on to the bottom the crack may continue to
grow until it reaches the edge. <Yes... I'd plan on this... you
can likely make a good repair by solventing (actually the process
here... not gluing) another thinner sheet of acrylic onto the bottom of
the existing one... over the crack and all else.> To remedy this
problem I thought about drilling a small hole at the two ends of the
crack to stop the crack from growing. Do you think this is a good idea?
or do you have any other suggestions? I look forward to your input,
<Do ask the folks at acrylic fabricating shops in your area, over
the Net what they would do as well. I would solvent a piece onto the
bottom and router off the edges. Bob Fenner> James
Cracked acrylic tank Do you see anyway of repairing
this type of thing? Could I drain the tank down and try some sort of
glue? Is there anything I could try before giving this thing up
completely? <Sorry to hear of this major problem. I would contact an
acrylic manufacturer about repairing this tank although I hold little
hope for repair. You would be safer just getting a new tank. At the
very least I would empty this tank ASAP and follow the suggestions from
the last email. You don't want to put this off until the whole tank
spills on the floor> Thanks for your patience with me. :) <No
problem...That's what we're here for! David
Dowless>
Acrylic tank-? I have built a corner tank with bent
corners( had a fab company bend) which cost a pretty penny. I tested it
out and there was a very small leak so I went back and applied more
solvent and tested again, no leaks. I have had water in it for about 3
weeks just to see if there would be leaks after a period of time and
there were none. In some of the seams though there is some air bubbles
I have tried to fill them in with solvent but it does not seep into the
bubbles leading me to believe that the edges are sealed. Do you think
that these bubbles could present problems in the future or what do you
think? <Likely not a problem if it hasn't been so to date. Bob
Fenner> Thanks for the info, James Wesley
Acrylic tank leak Hello. I recently purchased a used
125 acrylic tank and it has a leak. There is a crack on the bottom
right near the front of the tank. It does go all the way through the
tank and that is where the leak is. I was wondering if I could glue
another piece of acrylic or Plexiglas along the bottom of the tank
(inside) all along the front edge. If that will work, what would you
use to glue it? Should I use crazy glue and activator on the crack
first? Please help!!! <You can solvent (not really a glue... as
there is nothing left between the melded materials) a piece of acrylic
here (look for "square doweling" at an acrylic outlet
(it's only truly flush on two of the four sides, and you want to
fit these two against the existing panels). Look for Weld-on products
for solvent. Bob Fenner> Thank you, Ron
Tru Vu (acrylic tank re) Repair Howdy, <Hi there>
I am very glad I located your site and appreciate the valuable
information you offer. I am in the process of repairing a 55 GAL Tru Vu
acrylic aquarium which has some minor leaks. <Very unusual... I sold
these tanks for several years... none were defective, or became so>
I am concerned because I used the traditional method for a glass
aquarium and the tank is acrylic. Last night I applied DAP 100%
Silicone Aquarium Sealant to the length of the interior joints.
<Oops> Do you happen to know if Aquarium Sealant is going to work
or if I need to get out a razor blade and start all over with the
Weld-On product you mention in your postings??? <You do need to cut
out the silicone and use the solvent. Bob Fenner> Please advise.
Sincerely, Dan May
Help!! Tank blow out! Bob I have a tank that is 45
13/16 inches wide by 94 1/2 inches long by 33 7/8 inches tall One of
the long sides blew out due someone putting their full body weight on
the top while retrieving a fish. It first just popped the seam by a
couple of inches and this guy said he new how to repair acrylic tanks.
But as you can imagine he has disappeared. Now I have no one who can
repair my tank. Desperately seeking an acrylic tank repair person in
Downey, California. Sincerely, JC Benavides <The tank can be
repaired... should be drained, dried, and a square dowel inserted in
the (I would do the whole inside edges) inside corners... take care to
look carefully at and MARK the outside edges of the doweling that are
curved (IMPORTANT: Note that only two of the four dowel edges are
flush, the other two are concave...) and all solvented into place. Bob
Fenner>
Tru-vu built-in overflow question I just got a used
Tru-vu 100 gallon long (60x18x20) tank with 2 overflow on each corner.
Question is internal overflow size is about 6x6 do you know how much
gph is rated? I could not find this info from Tru-vu website...
<What is the diameter of the through-puts? You might call them as
well> I was thinking about using 1140gph external pump on this tank
but maybe this overflow draw more water than 600gph... <? What?>
Also due to moving this tank (forgot to take off bulkhead during move)
on both side near overflow area I have crack (not near by edge but near
by internal overflow L shape area) which is about 2 inch (Both overflow
area affected) <Bunk! Happens all the time.> I put 1/2" tick
(5x2 and 3x2)acrylic outside of overflow L shape and inside overflow
square shape acrylic (2x2) and glue them with tape plastic's glue
do you think this will be enough?.... <Should be... I hope
you're referring to having solvented pieces over the cracked areas
and holes and re-drilling them> once I have about 100lbs liverock
100lbs live sand and water... I am getting worried... <I would fill
and test it... outdoors> Maybe I should send you some pictures...
Thanks Chris <Bob Fenner>
Help! Acrylic Tank Leaking 07/02/05 Hello All!
<Hello Tammy> Have been rabidly searching your site (lots of
great information here) for about 45 minutes. I've found a few
suggestions to the problem I'm having, but was still a bit fuzzy on
the execution. (one recommended using dowels) The short short version
is this: I have a 110 gallon acrylic tank. Used for Saltwater. It is
only about 4 years old. I bought it new. It has only been moved once
since setup - I emptied it entirely and had it moved by pro's. It
has been in this apartment for 18 months without incident. Tonight I
decided it was time for the water change and drained off about 30
gallons. The front has always tended to bow - but I was assured by the
folks at the store that this was Ok. I suspect something about the
weight change made a seam leak - because all of the sudden I had a
steady drip-drip-drip in 4 places under my tank. (anywhere the stand
was drilled or even seamed it leaked through) And before I got the wild
idea to try and improve the water quality - there was no leak. (I'd
been under the tank changing the filter pad and carbon in the sump
first - so I'm certain of the "no leak" report). So
Yikes! So after deciding that all future tank work should be done
during normal business hours, I flipped over some Rubbermaid bins,
wiped them out - and started transferring water from the tank and the
fish. I now have an upside-down playpen over the bin safeguarding the
fish from my three inquisitive cats and 3lb dog. I've got the air
and heater running in their bin, so I think they're Ok for now -
though certainly not liking the close quarters. Where should I start?
Are acrylic tanks typically warranted? Do you expect I'll get
anything other than a "good luck" if I phone the store? I
know I'll need to scrub out the tank now - anything that you would
recommend to make sure that it's completely clean for repair?
Usually I just use my scrubby on a stick and lots of elbow grease...
but since I have the chance to take it down and really go to town on it
now - didn't know if you'd recommend something. Once I've
got it clean - Where do I begin to look for help locally? I believe the
leak is in the bottom seams because I got down to less than 5 inches of
water and still kept dripping. Is there something I can do myself? I
really hadn't budgeted for a tank replacement - and I'm afraid
this is my first leak. The fact that I'm on the 3rd floor and got
thru the whole incident without leaking onto the folks downstairs has
me reasonably confident that I could follow DIY instructions should you
have any for me.... :) Also - I'm a little worried that the leaking
could damage the structural integrity of the stand... Is that being
over-cautious? Or do I have more problems? My father will come over
tomorrow and help me lift the tank down for cleaning and I'll get a
better view. Maybe could put the hairdryer on anything still damp?
Thank you SO Much in advance for your help! And Happy 4th of July!
Tammy <Tammy, you need to start at the store where you bought it.
Most tanks have at least a five year warranty. At the same time, email
the tank manufacturer about the leak problem. Most will repair or even
send a new one upon receipt of the defective tank. James (Salty
Dog)><<RMF would actually start by filling the tank up
outside... with newspaper under it, trying to see if it is actually the
tank itself leaking... very likely it his a hang-on device
instead.>>
Re: Help! Acrylic Tank Leaking Hi Salty! <Hello
Redhead> Yeah, well you would think they would stand behind the
goods, but the store where I bought the tank has changed hands - and
the new owner indicated that he thinks that the guy that they bought it
from was hiring local acrylic shops to build tanks - as opposed to
selling tanks from national manufacturers. The guy was a little dodgy
as far as when I would mention looking for my warrantee paperwork, he
would just say that he was sure whomever made the tank was certainly
out of business. (which I loosely translated into - I'm not
honoring a warrantee?) Then the guy sat and wanted to sell me a new
tank, new stand, and then he tried to flirt. No game either. Don't
get me started. I considered telling him that I was flattered, but that
I was in a relationship and that my boyfriend was an attorney - loosely
translated, You'd better honor my warrantee or I'll sue cause I
have free legal. LOL! <I'm thinking when a store is sold the new
owner isn't responsible to honor any warranties, especially since
he didn't make any money on it.> But I really didn't want to
continue the conversation. Just awful. Instead of staying on point
about my tank, kept talking about what a pretty redhead I am - (my hair
is DARK Brown) Doh! Lousy service and just no game. :) Ugh. My tank is
a 110 gallon - measures 48 inches long, and 18 inches wide front to
back, and 30 inches tall. It doesn't look like Tenecor makes a
standard tank with those dimensions. Oh! And Thanks for the tip on the
self drill -vs.- ordered drilled. Important Safety Tip. Now if eBay is
a marker of what's out there - the folks making tanks like mine
brag that they're using the 1/2 inch - not that crap 3/8 that a lot
of people try to get by with. (dunno if that's true - that people
use the 3/8, that is) Tenecor does show a 140 tall: This model features
bent (seamless) front corners. Includes a clear acrylic top with filter
slots, access hole(s) and matching lid(s). Dimensions are 60"L x
18"W x 30"H Price: $913.00 While I can't find any
documentation on their site as to the thickness of the acrylic, I did
find a posting on another site talking about the thickness of acrylic
to be used... I've included the post content below, but the gent
says that his company uses 1/2 inch thick acrylic for tanks up to 30
inches tall and 600 gallons. He also mentions recommended/Ok
"bow" measurements. What to expect with glass and acrylic.
Dunno if it's correct - but thought I'd pass it along as well
in case your interested. Tomorrow I plan on calling my LFS that I trust
- and then calling their suggestion for an acrylic shop. I'll pass
along the prices and info that I get in case it's ever of any use
to you or yours. :) <If you don't live in a big town it may be
difficult to find an acrylic shop willing to build an aquarium and
guarantee it for a reasonable amount of time. Keep in mind if you are
or will be keeping corals, the deeper the tank the more wattage you are
going to require. James (Salty Dog)> Thanks again & Happy 4th!
Tammy
(Damaged) Acrylic tank assessment 7/4/05 I am sorry
this is such a long post. I just don't know what exactly is
pertinent information, so when you know enough just stop reading.
Reading the posts made me think really hard, and try to be perhaps too
observant. I posted here because you seemed to know a lot about tank
integrity. <Okay> I brought home a free acrylic (I think, are
there other plastics for tanks?) <Mmm, really only very small
ones... acrylic/s have many names, are about all of the same
composition> tank today. It is a TruVu brand, 16 deep 18 wide 60
long. There are cracks in the top and I don't know the owner
(neighbor of an ex-boyfreind), so I can't get the history of the
tank. It looks like it belonged to a fraternity (stickers and
spray-paint and graffiti). My ex- did say he was told it doesn't
leak. <Actual cracks or just crazing? Can you feel breaks in the
material? These are indicative of cracking> I am afraid it will
fail. I am not concerned about a slow failure, I am afraid that some of
the cracks will just split with no warning after the tank is in use
some time. I also see what I think is some crazing. <Ah, I see> I
haven't filled the tank to test it because I wonder if I should
repair it first. The link to the repair story is broken, so I
couldn't read it. <Unfortunately there is no such piece... just
haven't gotten around to writing it...> If there is a quick easy
fix that may hold this tank together, I will do that first. <It may
be that the cracks can just be ignored (fill this tank outside and see
how it does), otherwise, the solvent used to weld the tank panels
together may be used to anneal the cracked portions (call, write TruVu
re Weld-On...). At worst, another panel (thin) of the same size,
cut-outs may be solvented to the top/cracked one> CRACKS: These may
have been produced by heat, as I read in other posts. My reasons for
thinking so are that the top of the tank is warped, and there is a
small area of the top that looks like it may be air bubbles. Does
acrylic "Boil" from heat? Also, the edges of the cracks are
warped and do not match each other. <Warping is common... these
tanks bend quite a bit with use/time... boiling is very bad> If the
cracks were caused by heat, might the tank be compromised to the point
that it will fail, because the top is an important structural member?
<Doubtful, but a possibility> My reasons for thinking it is not
heat is I do not see any blackening or discoloration. Also, one crack
actually extends down the side of the tank about an inch. Could this
crack be from an impact? <Yes, most likely... am starting to have
glimpses of "Animal House"> I haven't filled the tank
to test it because I wonder if I should repair it first. The link to
the repair story is broken, so I couldn't read it. If there is a
quick easy fix that may hold this tank together, I will do that first.
There are four cracks in the top of the aquarium, they all run from a
corner of the large cut out to the side of the aquarium. <These are
best repaired per above> The two in the back run from the side
cutout to the 1-1/4 diameter hole, to the back of the tank. One
CONTINUES down the side of the tank about an inch, this portion of the
crack is not perpendicular, but actually at an oblique angle to the
tanks surface. <Also best repaired> The tank top has two
rectangular cut-outs, two smaller rectangular cutouts, six 1/4"D
circular holes, and 2 circular holes about 1-1/4 "D. One of the
1-1/4 inch holes is not really circular, it looks as if a smaller hole
was drilled off center of the larger one, however the edges are nice
and smooth, so I don't know if these holes were homemade, or poor
quality control of the manufacturer. But the crack is not located near
this bump. CRAZING: It is a really sunny day and I noticed when looking
obliquely at the tank outside that there was a glittery sheen inside
the acrylic. It seemed to be pretty uniform throughout the back surface
of the aquarium, and I did not see any direction to it, just little
spots of glitter. I could not see them on the other sides of the
aquarium, but this could be because I did not turn the tank to the same
angle. I suspect that it is crazing. (If not, what could it be?)
<Likely crazing... though could be marks from solvent, local
pressure or heat stress> I cannot see it at all when the aquarium is
viewed straight on. And I don't think I could see it in indoor
lighting. Is a certain amount of crazing a normal occurrence? Does it
happen in every tank? <Is common> USE: When I first saw the tank,
I thought that it wasn't very useful for a display tank. Now I am
thinking that it actually would look pretty funky as a type of urban
community tank. What do you think of this idea? Thank you, Mary <If
you have the time, interest, worth trying to effect a repair. Bob
Fenner>
Re: Acrylic tank assessment 7/6/05 Thank you for your
reply. I was unsure about how to weld the cracks closed. The edges
don't line up, and in some cases, the irregularities of the edges
get in the way of realigning the acrylic. I took the tank into TAP
plastics today. They suggested that I drill a small hole at the end of
the crack before I weld. This will relieve any stress at that point
from the misalignment. <Interesting> This makes sense. (Lucky
that all the cracks end one inch from the top.) It is consistent with
the reason that larger diameter corners are stronger, the stress is
distributed over a larger area. <Yes> The weld-on #16 cost $3.05.
The piece of scrap would have been $1, but he threw it in for free.
Must have felt sorry for me, trying to save such a pitiful tank. He
should only see my car! LOL! <Likely> He thought the warp on the
cross member would not affect its strength, and that I don't need
to reinforce it. <Okay> He had no idea about the crazing unless
it was a solvent. I suppose its possible the gut tried cleaning it with
something weird. But I really don't think so, it is so evenly
distributed. <Is just "stress" over time mainly> I just
wanted to share with you the idea of drilling. Wow a 75 gallon tank for
$3.05! I'll let you know how things go with my experiment.
<I'd appreciate this> I will drill the holes, wash the tank
(soap and water he said) <Mmm, no... avoid soaps, detergents...
toxic to aquatic life, hard to remove, leave a film... water and
vinegar, possibly straight vinegar (white) for "scale"...>
and weld a piece of scrap over each crack. I am toying with the idea of
welding an acrylic divider in the middle to compartmentalize it into
two tanks, but I haven't decided yet. <Mmm, worth considering...
but hard to change later> I would prefer a removable divider, but
since the acrylic will flex, I don't know how I could do this.
<There are commercially made dividers, but these are a bit flimsy
for this sort of tank> Right now I really could use smaller tanks.
Well its time to stop blathering, and see if this idea will hold water!
Mary
<Real good. Bob Fenner>
|
|

