|

Tips, Tricks and Reminders for Ease of Care and
Beauty!
Anthony Calfo
If you are
considering building a pond or even if you already have some pond experience,
this article will introduce you to some novel tips and tricks, dispel some myths
and perhaps reinforce good notions you may already have for pleasant endeavors
with aquatic gardening. Whether your preference is for flexible pond liners
dressed to make a natural-looking oasis or for formal appointments in stone,
concrete or tile, there are commonalities to the keeping of all outdoor ponds
that we can easily summarize for success.
Garden ponds can,
and usually should be very simple to construct and operate. Maintenance tasks
are minimal and require less time than any other expressions of keeping
aquariums or aquatic features. With good planning and a strict adherence to some
simple rules you can enjoy a enjoy pond-keeping like a pro! Let me take you on a
pictorial "crash course" of sound techniques to make sure your aim is spot-on:
Far and away, the
biggest concern and complaint about garden ponds is algae. For this reason more
than any other, folks tired of fighting a losing battle with the unwanted greens
ignore or shut down their ponds. This is most unfortunate since prevention or
solutions to unwanted algae are inexpensive and often quickly rendered! Dreadful
mistruths and half-truths abound about causes and cures for these low-lives
(literally), most notoriously that excess sunlight causes algae and reducing
light will cure it. Bunk. Rubbish. In plain language, sunlight does not cause
nuisance algae… excess nutrients cause unwanted algae. You can find many
successful ponds in full blazing sun with crystal clear water, and find many
more ponds in poor or indirect light swimming in green scum. Reducing unwanted
algae is entirely about nutrient control.
New hobbyists are
admittedly prone to being eager and may overstock their pond (too many fishes
added or added too quickly) and overfeed their new fishes. In such cases, it
could not come at a worse time since a new pond may be rich in minerals or
nutrients from being recently filled with tap or other source water (e.g., well
water is often loaded with nutrients that fuel algae). In the early stages,
filters are immature and plants are not established or may not even have been
added yet. The textbook solution is prevention and patience. Add as many plants
and filters (manmade and/or bog) as you can early, and proceed very slowly with
fish stocking and feeding. This speaks directly to the issue of nutrient export
elements (plants and filters) versus nutrient import elements (hungry fishes,
turtles, frogs, etc.). Pondkeepers with an appreciation for bog and submerged
aquatic plants can even get to the point very soon where no manmade filters are
required whatsoever! Even large pools can remain crystal clear all year around
and enjoy hearty loads with fishes that do not need fed, all for having patience
in wait for strong plant populations to grow. Read on about how to find and pot
those plants (and how to still avoid nuisance algae if you are too eager
and impatient, with a small investment in technology!). The fundamental goal
here is to strike a balance much like a successful ecosystem in the wild. We
want seed our pools with desirable nutrient consumers and provide these
organisms with just enough sustenance to thrive in a tidy aquatic microcosm.
Some of the wonderful dynamics at play include: insects attracted to the water
that lay eggs and provide larvae for fishes to eat, maintaining water quality so
that just enough microalgae develops to sustain grazing herbivores (snails,
fishes, etc.), mechanical filters catch gross particulate matter for quick
export (cleaned frequently), pumps used for water circulation or biological
filters, maturing rooted and floating plants absorb considerable amounts of
nutrients from decaying matter (fish waste, leaf litter, etc), and small
predators like frogs and catfish control the potentially explosive reproductive
rates of common carp and goldfishes by eating the smaller fry.
Buying a water
pump: Even if you choose to forego buying or building a large biological
filter because you'll have a very heavy plant population and low fish load, you
will still need to protect water pumps from clogging quickly or wearing out too
soon. Few garden ponds can survive (especially with fishes) without some form of
constant water movement. It’s a sometimes fatal mistake yet not uncommonly
misadvised directive that shutting the pumps off at night is OK to save on
electricity, or for any other reason. This is dangerous and not recommended.
Since plants and algae only photosynthesize and produce oxygen during the day,
natural biological processes lead to a drop in oxygen levels at night and
turning off of circulating pumps lets this drop fall even further. Frustrated
pond keepers that have fish that seem healthy by day but are dead the next
morning should consider oxygen deprivation (especially when it’s the
larger/largest fishes that die first). Even without turning off pumps, the
dynamic can occur in systems that are suffering badly from "green water"
(suspended unicellular algae), which due to their high density, can lethally
lower oxygen levels (for these fishes) at night with respiration. Enough said…
everyone gets a pump and runs it full time at least for the active pond season
(above 50 F). There are many wonderful features with water pumps for your pond
anyways like fountains and waterfalls.
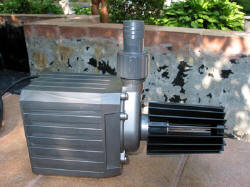 |
|
A quality pump is an invaluable asset
for your pond. |
There are many
choices among water pumps starting with external versus internal. Beyond any
obvious constraints (construction and layout of pond, aesthetic preferences,
etc.) that lead you to a specific pump size or placement, one of the most likely
influences on your purchase should be efficiency. There are sometimes
extraordinary differences in power consumption between brands for like-sized
pumps. A good pump can be had for most ponds utilizing no more than a few
dollars in electricity monthly. These tend to be the magnetic drive units, which
have an impeller that "floats" on a shaft inside the pump housing. They do not
suffer from resistance placed on them by valves used to reduce water flow (they
actually run better/longer with at least a little resistance). And the modern
evolution of this style pump has essentially overcome previous shortfalls with
strength to operate the pump at great head (pressure and height, as with long
runs of pipe and many joints of constriction). Only for the heaviest duty needs
will a direct-drive pump likely be needed. These units sometimes are much
stronger and can pump higher than magnetic drive units, but they come with a
price – most notably expense to operate. Most popular direct-drive pump models
in the hobby are not submersible either. Pictured here (inset) is a nice
mid-range pump line: the Supreme "Mag-Drive". They are a good value in my
opinion - balancing cost of purchase, efficiency and expected life.
|
 |
 |
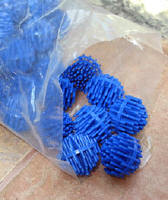
| Filters and Pre-filters: Submerged pumps used for
feeding water falls, biological filters, fountains or simply just water
movement and aeration in the pond can be protected with an incredibly
simple, inexpensive and low maintenance DIY pre-filter. With a bucket,
some coarse media (lava rock, aquarium filter "bio-balls", plastic hair
curlers, etc.) and a polyester pad for pre-filtration, a good pump guard
or even adequate biological filter can be constructed for mere dollars –
these are DIY "bucket filters." |
.jpg) |
.jpg) |
.jpg) |
.jpg) |
| Starting with an empty bucket, place your submersible
water pump at the bottom after it has been properly fitted with any
flexible or rigid tubing your need. Next, fill the bucket with rinsed
bulk media (lava rock is used in the illustration here… one $5 bag at
the local home & garden center fills two five gallon buckets!) to serve
as a gross mechanical and biological filter. Next, cut a snug fitting
layer of thick spun polyester fiber pad for a prefilter to sit above the
media. I prefer to use two prefilter pads on top to be rinsed
alternately. |
|
 |
| Various brands and types of filter pads can work for this purpose, but
I specifically prefer the sturdy, thick types (coarse spun polyester
fiber mats) marketed for pond keepers as they are efficient, easy to
rinse and re-use, and a good value. |
 |
 |
.jpg) |
| Is the specially designed filter media marketed for garden
pond filters really better? Well… yes, often they are. But this DIY
bucket filter is not designed for keeping heavy fish loads or as a
primary biological filter. We are merely trying to construct an easy to
service and inexpensive pre-filter that will keep our water pumps
running smoothly. In ponds with adequate water flow, proper feeding and
stocking, and reasonable maintenance (e.g., cleaning out leaf litter
periodically and doing regular partial water changes), you can expect a
DIY bucket filter with lava rock, "bio-balls", or the like, to need
serviced once monthly (rinsing the pre-filter pad). Remove the pump
twice annually for a thorough cleaning of all aspects (Tip:
running the pump overnight in a tub of water with a few cups of vinegar
to clean it out nicely). |
|
 |
| Tip: Flexible tubing can be a bit difficult to force down onto
insert fittings far enough for a good seal with pressurized pumps and
plumbing. A really easy trick is to heat a cup of water (without a tea
bag) and soak the tubing ends for a few minutes. This can even be used
to "persuade" tubing sizes that are a bit smaller than they should be to
marry some insert fitting. Hot flexible tubing slides down easily onto
insert fittings and then shrinks very snug once it cools to make a very
good fit. Plastic or steel hose clamps may still be necessary as with
pressurized installations. Aquarium hobbyists are accustomed to using
clear vinyl tubing for pump applications, but this material is a bit
weak and too clear for outdoor use (algae growth inside). For pond use,
spend a little more money for durable tubing with fiber braids infused
(see picture above), or invest in actual flexible PVC tubing. |
 |
 |
.jpg) |
| Although flexible tubing offers convenience to install and
is necessary for awkward or irregular paths of water flow, hard pipe
really is preferred whenever possible for its durability and utility.
Outdoor pond hardware must withstand the rigors of weather, home and
garden tools, foot traffic, animals and children and various other
challenges. Use flexible tubing minimally as it is more prone to leaks
and the accumulation of mulm and algae through opaque or clear piping
walls. Hard pipe, on the other hand, can last and remain trouble-free
for many decades if installed properly. If you are a "weekend warrior"
and really have no practical experience with plumbing, please do seek at
least a little bit of professional advice. Before committing the time
and expense to hard lines, you will want to know the differences between
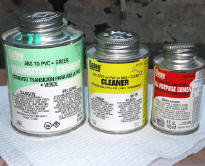
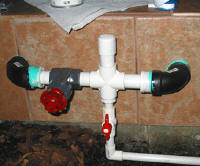
ball and gate valves, why is it critical to use cleaner and primer
before gluing any joints, and the fact that not all plastic pipe is
compatible in size or weld, requiring specialized or transitional glues
sometimes as with merging PVC and ABS (pictured above in black and white
colored pipes with green glue). |
 |
 |
 |
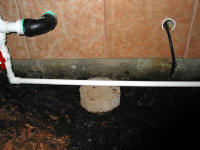
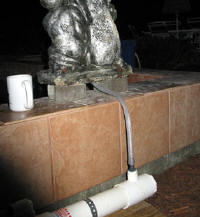
| Hiding unnatural features of a pond takes just a
little bit of strategy and creativity. External commercial filters (and
home-made external bucket or barrel filters) are commonly submerged
under ground – partially if next to the pool, or perhaps almost fully if
at a higher elevation as with a hill or peak of a waterfall feature.
Hard pipe plumbing can usually just be buried (left picture above –
exposed pipe); soft tubing can also be buried if shielded by conduit to
prevent chewing animals or future garden shovels gone astray from
piercing the lines. Weather-resistant equipment like some UV sterilizers
(center picture above) may be covered in mulch or similar landscape
dressings. A proper roofed hutch would be best of all but they are the
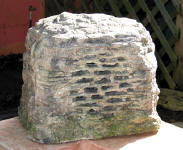
hardest to hide discreetly. Some hardware made for the aquatic garden is
designed to try to blend into the landscape at least a little, like this
faux granite outdoor speaker (right picture above) that has been in my
service for nearly a decade… getting covered in snow every winter
J |
 |
 |
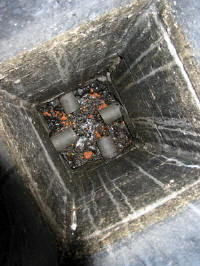 |
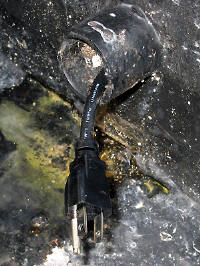
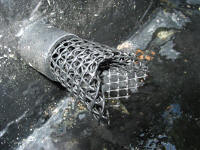
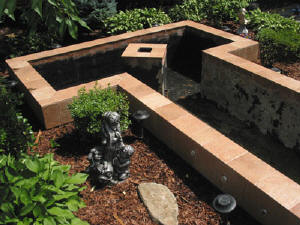
| With thoughtful planning in advance, you can really do a
brilliant job of hiding pumps, tubing and electrical lines. In the
illustrating photos above, an island was built (top left picture) to
support a water feature (pump fed statuary). The island is hollow with
four large water intake tubes at the bottom of the pillar (bottom
picture). At the bottom of this well, I placed a simple bucket filter as
described above to supply filtered water to the statue. Like any good
garden pond water pump, the model used to power this statue has an extra
long power cord. The electrical cord was fished through one of the water
intakes (upper right picture) and then out through another pre-planned
bulkhead in the side wall of the pond. Thus, no distracting lines or
cords needed slung over the decorative sill of the pond. |
 |
 |
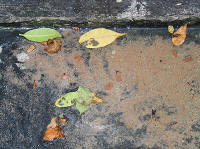 |
| All four water intake ports at the bottom of the fountain
island screen leaf litter and large matter (like fishes!) by using some
inexpensive rain gutter plastic mesh rolled up and stuffed into the
pipes. You can imagine many other alternatives for this. The bucket
filter can go many weeks or even months requiring little or no service.
The fruit of this effort (pictured below) is the uncluttered operation
of a lovely bronze water fountain. Take the time to do such thoughtful
planning for the better enjoyment of your garden pond for many years to
come. |

.jpg) |
.jpg) |
 |
| Potting pond plants is a topic of some debate,
rightly so, for the great variety of species employed and their
differing needs. Some plants naturally live fully submerged, some
partially immersed (bog plants) and some plants sold in the hobby are
not even truly aquatic at all but live wet or submerged long enough to
satisfy a customer in a season. In keeping with the theme of this
article, my suggested potting technique is intended to be simple, clean
and easy to maintain. First the facts: most aquatic plants do not need
soil or mud substrates for success as they derive their nutrition from
all parts (leaves, stems, roots) unlike terrestrial plants. Most potted
plants will need to be regularly repotted (every 1-3 years) for health
and vigor if not to control growth. This task is commonly ignored and
plants may suffer or die in the constricting pot or even just burst the
vessel at the seams. If the plant was potted with any soil, you can
imagine what a mess that can be. Soil from potted plants (as with
run-off from poorly designed ponds, which allow rain to run off the land
and carry unwanted nutrients, poisons, and other matter into the pond)
is also a serious factor in water turbidity and nuisance algae growth.
For most lilies and bog plants, I simply do not recommend using soil at
all in the mix. For heavily flowering plant species and spurred growth
in others, judicious use of fertilizing tablets are an option. Beyond
concerns of pots breaking, they can often tumble over with wind and
weather (as with bog plants partially submerged), or be knocked over by
gardeners working in the pond. Some large and vigorous fishes like
Japanese koi or adult goldfishes may even topple potted plants as they
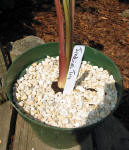
root for food in and around the pots. I recommend using stone and
gravel wholly as a substrate to pot most pond plants. Use plastic pots
with holes for at least a little bit of oxygenated water to diffuse.
Large gravel or chunks of stone fill the bottom layer of the pot (see
pictures above). Medium to fine pea gravel works well to fill the rest
(a majority). Be sure to leave the crown of the plant exposed to light;
this is the part where the leaves sprout from. It can be stressful or
fatal to cover the crown in some plant species. This a tidy method for
potting and repotting plants that you will come to appreciate more as
the years go by. |
 |
 |
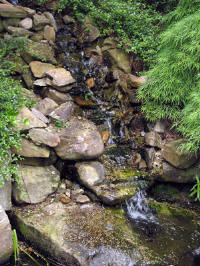 |
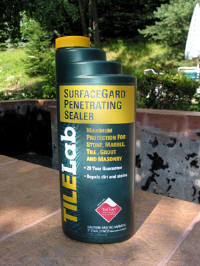
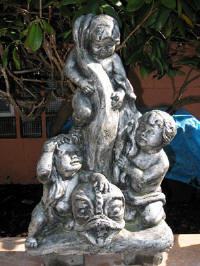
| Even if your pond is not constructed of concrete or stone,
you most likely have some of these materials in and around your garden
pool. Mortar may be used to build water falls or dress the edges of a
lined or natural (clay) pond with natural rocks. Many decorative statues
are still made of concrete or perhaps your pond is finished in tile? All
of these stony products will likely benefit from an annual treatment
with sealer to extend their lifespan to many decades. |
 |
 |
| Actual cracks or repairs are quite easy to remedy nowadays
with modern cement products infused with plastics and even designed to
set up underwater (in minutes to seal leaks)! Some go by the name "hydraulic
cements"; ask your swimming pool center or local home and garden
store for recommendations. |
.jpg) |
 |
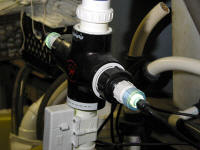 |
| U.V. Sterilizers - the green-water algae "cure".
I proffer this advice with some sarcasm: a "cure" for a symptom (unicellular
algae) rather than treatment of the real problem (excess nutrients). I
also share it with some irony as I use the very device myself on most
all of my ponds and installations, if only as a back-up. The ideal pond
and the reality of how most ponds are built, inherited, or otherwise
run, are often two very different things. Nutrient control can be a
challenge in most systems. Rains wash nutrients into low lying ponds.
Winds carry leaves and other organic debris into the pool. Aquatic birds
visit and deposit considerable amounts of waste. Fishes grow and
reproduce and present and ever-growing burden on the bio-load. People
generally have busy lives and may not tend to pond maintenance as
diligently as they should. There are many other common explanations for
how nutrient levels can exceed the capacity for filters and aquatic
plants to handle them, leading to unsightly problems with "greenwater".
To all of these problems, there is one very simple solution: a
pond-ready UV sterilizer. For likely less than $200, a properly sized
"UV" can clear most any unicellular algae bloom in days. These units are
typically not installed properly though! It is crucial that all water
pumped into a UV be highly filtered (carbon and fine mechanical
filtration) to ensure colorless water without any particles or
turbidity. Indeed, excellent pre-filtration is critical. The lamp inside
also needs to be changed every 6-10 months (just once annually at the
start of each new pond season for those in temperate climates). Typical
placement is at the end of the line in your filtration scheme: just
before a fountain (pictured above center) or hidden at the top of a
water fall are popular positions. Each unit will also have a recommended
maximum water flow that must be obeyed. The slower the better is usually
best for maximum efficacy. There are some interesting new units on the
market now (pictured above right) with high intensity lamps that can
handle remarkably high water flow (for large pumps/ponds… rather than
imposing the need to plumb a slow bleeding line off of current
installations). An additional benefit (and one for which these units are
principally designed and marketed for) is disease control. UV
sterilizers kill or denature unicellular algae and numerous undesirable
parasites and micro-organisms. |
 |
 |
|
Water changes: My friends and regular readers have
to be tired of hearing me chant this mantra by now, but I'm on a mission. "The
solution to pollution is dilution!" I cannot emphasize enough the importance of
partial water changes for keeping aquatic life in closed systems
successfully for the long term. Sparing you the science lesson as this
installment draws to an end, it should be clear that there is no filter or
product on the market or known to man that tracks all desirable and undesirable
elements of water quality, replacing necessary ones and neutralizing or removing
all harmful ones. The filtration that we employ (living and man-made) is helpful
and necessary for maintaining a tolerable if not healthy water quality for
aquatic organisms. But it is a losing battle that will be lost without partial
water exchanges to bring "things" back on par. Topping off for evaporation is
often mistakenly counted as a "water change," but it does not dilute or remove
the dissolved and daily accumulating waste products that your fishes and plants
are producing and living in. It merely reconstitutes them, or rather…
ameliorates them. I strongly recommend a partial water change of at least 20%
monthly for ponds with a moderate bio-load. Systems with a heavier burden will
benefit from weekly partial exchanges instead.
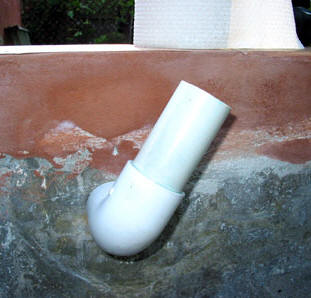
Whenever possible, install an overflow on your pond too.
This is surprisingly easy to do on a concrete or lined pond even after they are
built. For concrete or stone ponds, a hammer drill and long masonry bit will
forge the hole through which to seal a pipe in (right picture) in a matter of
minutes. Pond liners are even easier to add an overflow to with a knife to cut a
hole and fit a plastic bulkhead with gasket through (they even make curved wall
bulkheads for such applications). Having an overflow to handle heavy rains and
having an outlet to pump dirty water into during water changes is one of the
most underrated aspects of pond design. It's also a priceless feature you'll be
grateful you added in time.
|
 |
 |
|
In this overview of tips and tricks for easy and
successful pond-keeping, there were many wonderful aspects of husbandry and
hardware that got no mention at all. Short of writing a book about it (my dear
friend Bob Fenner and I are seriously threatening to write the "Conscientious
Pond Keeper"!), I have inevitably missed covering some very worthy topics.
For these things and more, I strongly encourage you to get involved with local
and regional water gardener's clubs. There are national clubs and journals to
subscribe to and numerous books and magazines to get you on your way. Thoroughly
explore this wonderful marriage of landscape and aquarium hobbies, and be sure
to enjoy the journey. Aquatic gardeners find great pleasure and relaxation
starting or ending their day by the pond and contemplating the evolution – you
will too. With kind regards, Anthony Calfo.
|
|
Designing Your Aquatic Garden On WWM
Related FAQs:
Water Feature
Design,
Pond Design 2,
Pond
Construction Methods,
Related
Articles:
Designing
Water Effects,
Size,
Siting, Pond
Construction:
Block,
Liners,
Concrete
and Pond Liners, Repair,
Plumbing,
Electrical, Pumps,
Example
Ponds/Water Features,
|
|
|
|
